No Heat Meal Prep Lunches Perfect For The Office
No heat meal prep lunches are ready-to-eat dishes prepared in advance that don’t require any cooking or reheating. They are ideal for office settings, picnics, or any situation where access to a stove or microwave is limited. These meals focus on fresh ingredients and smart assembly to ensure they stay delicious and safe to eat cold.
The Magic of No-Heat Lunches
No heat meal prep lunches are a secret weapon. They save you time and money. They also help you eat healthier.
Think about it. No more waiting in line at the office microwave. No more feeling guilty about that daily $15 lunch order.
These meals are designed to be made ahead. You just grab and go. This means a stress-free morning.
It also means a delicious lunch waiting for you. We are talking about real food. Food that tastes good even when it’s cold.
It’s about making your workday a little easier. And a lot tastier.
The beauty of these meals lies in their simplicity. You don’t need fancy equipment. Just a few good ideas.
And some fresh ingredients. It’s about smart choices. Choices that work for your busy life.
We will dive into what makes a great no-heat lunch. We will look at different types of meals. And we will share tips to make them last.
Why No-Heat Lunches Make Sense for Work
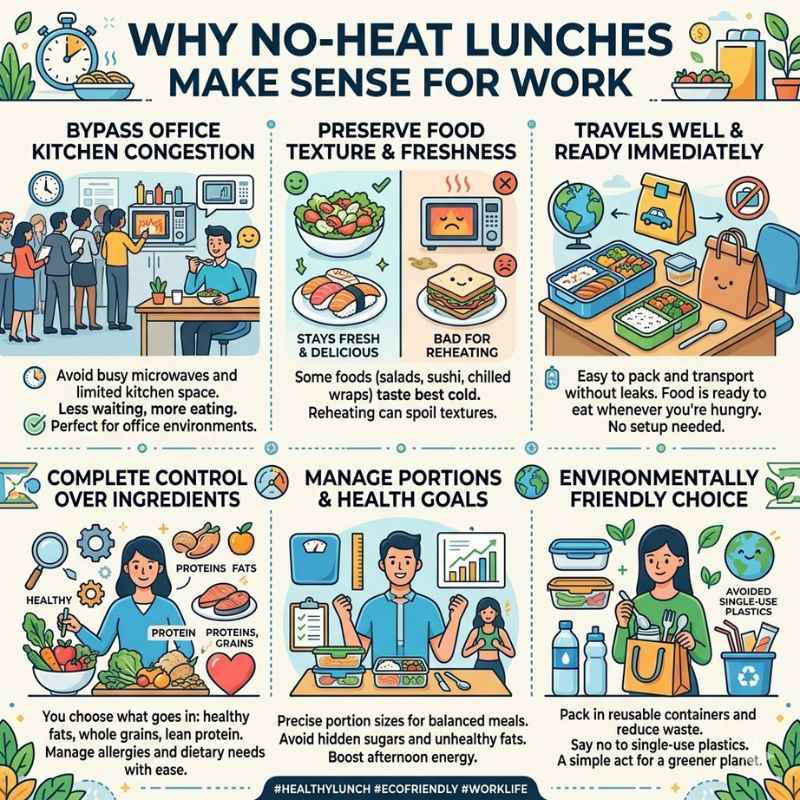
Let’s talk about why this is such a good idea. Especially for office workers. Many offices have limited kitchen space.
Microwaves can be crowded. Or maybe they just aren’t the best for certain foods. Some things get weird when reheated.
Think about a crisp salad. Or delicate sushi. Reheating ruins them.
No-heat options bypass this problem entirely. They are perfect for packing. They travel well.
And they are ready the moment you are hungry.
Another big win is control. When you make your lunch, you know what goes in it. You control the ingredients.
You control the portion sizes. This is great for health goals. It’s also good for managing allergies or dietary needs.
You avoid hidden sugars or unhealthy fats. You get a balanced meal. This means more energy for your afternoon.
It means feeling good about what you eat.
And let’s not forget the planet. Packing your own lunch often means less waste. You use reusable containers.
You avoid single-use plastics. This small act adds up. It’s a small step for you.
But a bigger step for our environment. It feels good to eat well and do good.
My Own “Lunch Rut” Moment
I remember one particularly rough week. It was a Tuesday. The sun was shining outside, but inside, my office felt…dim.
I had skipped breakfast, a bad habit I’m still working on. By noon, my stomach was growling so loud I worried my coworkers could hear it. I’d packed a sad salad the night before, but the lettuce had wilted.
It looked depressing. The dressing, packed separately, had leaked a little. A small puddle of vinaigrette had created a soggy mess at the bottom of my container.
I stared at it, feeling a wave of annoyance. This wasn’t just a bad lunch; it felt like a symbol of my week. Rushed, uninspired, and a bit of a mess.
I ended up ordering a greasy burger. It made me feel sluggish for the rest of the afternoon. That’s when I decided enough was enough.
I needed lunch ideas that were reliable, tasty, and genuinely easy. Ideas that didn’t require me to be a culinary genius or have a magic oven. Ideas that would make my workday lunch feel like a treat, not a chore.
I started experimenting with wraps, grain bowls, and hearty salads that held up well. It was a journey, and I learned a lot. This experience fuels my passion for sharing these simple, no-heat lunch solutions.
Building Blocks for Great No-Heat Lunches
Base Ingredients: Think hearty grains, sturdy greens, and filling proteins.
- Grains: Quinoa, farro, couscous, brown rice.
- Greens: Kale, spinach, romaine, arugula.
- Proteins: Chickpeas, black beans, lentils, grilled chicken, hard-boiled eggs, canned tuna or salmon, tofu, tempeh.
- Healthy Fats: Avocado, nuts, seeds, olive oil.
Hearty Salads That Won’t Wilt
When we think of salads, we often picture delicate greens. These wilt fast. But a salad can be a powerhouse meal.
The key is choosing ingredients that stand up well. Think sturdy greens. Kale is a great example.
Or use a mix. Add a hearty base like cooked quinoa or farro. This makes it filling.
It also absorbs dressing without getting mushy.
For protein, beans are your best friend. Chickpeas, black beans, or lentils add fiber and protein. They taste great cold.
Grilled chicken or hard-boiled eggs are also good choices. Don’t forget healthy fats. Avocado adds creaminess.
Nuts and seeds provide crunch and nutrients. A lemon vinaigrette or a tahini dressing works wonders. Pack dressing on the side to keep things crisp.
Or mix it all up right before eating.
Example: The “Power Quinoa Salad”
This salad is a go-to for a reason. It’s packed with flavor and nutrients. It’s also super adaptable.
Start with a base of cooked quinoa. Add rinsed and drained chickpeas. Toss in some chopped cucumber and bell peppers.
A sprinkle of feta cheese adds a salty kick. For crunch, add toasted sunflower seeds. The dressing is simple: olive oil, lemon juice, a pinch of salt, and pepper.
Mix it all in a jar. It stays fresh for days.
Ingredient Breakdown: Power Quinoa Salad
Components:
- Base: 1 cup cooked quinoa
- Protein: 1/2 cup chickpeas
- Veggies: 1/4 cup diced cucumber, 1/4 cup diced bell pepper
- Flavor Boost: 2 tbsp crumbled feta cheese
- Crunch: 1 tbsp toasted sunflower seeds
- Dressing: 2 tbsp olive oil, 1 tbsp lemon juice, salt & pepper to taste
Wrap Stars: Easy and Portable
Wraps are a classic for a reason. They are self-contained. They are easy to eat on the go.
And they can hold so much goodness. The trick is using the right wrap. Whole wheat tortillas are a good choice.
They are more filling. They also hold up better than white ones. Load them up with your favorite fillings.
Hummus is a fantastic base. It’s creamy and healthy. Spread it edge to edge.
Next, add your protein. Sliced turkey or chicken works well. Or try some seasoned black beans for a vegetarian option.
Layer on some crisp veggies. Spinach, shredded carrots, and sliced bell peppers add color and crunch. A sprinkle of cheese is optional.
Roll it up tight. You can even slice them in half. This makes them easier to handle.
For an extra touch, wrap them in parchment paper. It keeps them neat and tidy.
The “Mediterranean Hummus Wrap”
This wrap is bright and fresh. Spread a generous amount of hummus on your tortilla. Add some chopped Kalamata olives.
A handful of spinach leaves is next. Then, some crumbled feta cheese. For some added crunch, add a few thinly sliced red onions.
Roll it up tightly. This wrap is a taste of sunshine. It’s satisfying without being heavy.
Quick Scan: Mediterranean Hummus Wrap Fillings
Layering Order:
- Hummus
- Kalamata Olives
- Spinach
- Feta Cheese
- Red Onion
Grain Bowls: The Versatile Powerhouse
Grain bowls are like a blank canvas. You can put almost anything in them. They are incredibly versatile.
Start with a base of your favorite grain. Quinoa, farro, brown rice, or even couscous work well. Cooked grains are best.
Let them cool before assembling. This prevents other ingredients from getting soggy.
Add your protein. Grilled chicken, baked tofu, or hard-boiled eggs are great. Lentils or edamame are also excellent choices.
Then, load up on the veggies. Roasted sweet potatoes or broccoli taste good cold. Fresh options like cherry tomatoes, corn, and avocado are also perfect.
Add a delicious dressing. A simple soy-ginger dressing or a creamy peanut sauce can transform the bowl. Store dressing on the side.
This keeps everything fresh.
“Asian-Inspired Tofu Bowl”
This bowl is a flavor explosion. Start with cooked brown rice. Top it with pan-fried or baked tofu cubes.
Add some steamed or roasted broccoli florets. Edamame adds a nice pop of green and protein. Shredded carrots and sliced green onions add crunch and freshness.
The dressing is a mix of soy sauce, sesame oil, rice vinegar, and a touch of honey or maple syrup. Drizzle it over everything. It’s a filling and delicious meal.
Asian-Inspired Tofu Bowl – Key Components:
Base: Brown Rice
Protein: Tofu
Veggies: Broccoli, Edamame, Carrots, Green Onions
Dressing: Soy Sauce, Sesame Oil, Rice Vinegar, Honey/Maple Syrup
Jar Meals: Layered Perfection
Mason jar meals are visually appealing. They are also practical. Layering your ingredients in a jar keeps them separate.
This prevents sogginess. It also makes for a beautiful presentation. The key is layering correctly.
Dressing always goes on the bottom. This way, it coats the ingredients closest to it. But doesn’t touch the delicate ones.
On top of the dressing, add your heartier ingredients. Think beans, grains, or sturdy vegetables like carrots or bell peppers. Then add your protein.
Next, layer lighter veggies. Finally, on top, add greens or crunchy toppings like nuts or seeds. Seal the jar tightly.
When you are ready to eat, just shake it all up. Or pour it into a bowl. It’s like a grab-and-go salad bar.
“Layered Lentil & Veggie Jar”
Start with a simple lemon-herb vinaigrette at the bottom of a large mason jar. Next, layer in cooked lentils. Then add diced celery, chopped bell peppers, and shredded carrots.
Next, add some crumbled goat cheese or feta. Top with a generous handful of baby spinach or arugula. Seal the jar tightly.
This jar is packed with fiber and nutrients. It’s a light yet satisfying lunch.
Jar Meal Layering Order (Bottom to Top)
1. Dressing
2. Hearty Veggies (Carrots, Peppers)
3. Protein/Legumes (Lentils, Beans)
4. Cheese (Optional)
5. Delicate Veggies/Greens (Spinach, Arugula)
Pasta Salads That Shine Cold
Pasta salads don’t have to be heavy or mayonnaise-laden. A well-made pasta salad can be a fantastic cold lunch. Choose a sturdy pasta shape.
Rotini, farfalle (bow-tie), or penne hold sauces well. Cook the pasta al dente. Drain it well and rinse with cold water.
This stops the cooking. It also prevents clumping.
Mix in your favorite vegetables. Cherry tomatoes, chopped cucumbers, and bell peppers add freshness. Olives and sun-dried tomatoes add a briny flavor.
For protein, consider adding canned tuna or salmon. Or toss in some white beans. A light vinaigrette works best.
Olive oil, red wine vinegar, garlic, and Italian herbs make a classic dressing. Add some fresh basil. It elevates the whole dish.
“Mediterranean Orzo Pasta Salad”
This orzo salad is bursting with flavor. Cook orzo pasta. Toss it with chopped cherry tomatoes, cucumber, and Kalamata olives.
Add some crumbled feta cheese. A handful of fresh parsley and mint adds brightness. The dressing is simple: olive oil, lemon juice, dried oregano, salt, and pepper.
Mix everything gently. It’s a refreshing and filling choice.
Mediterranean Orzo Pasta Salad – Mix-Ins:
Pasta: Orzo
Veggies: Cherry Tomatoes, Cucumber, Kalamata Olives
Cheese: Feta
Herbs: Parsley, Mint
Dressing: Olive Oil, Lemon Juice, Oregano
“Snack Box” Lunches: Variety is Key
Sometimes, a single meal feels too much. Or you just want a bit of everything. This is where the “snack box” lunch comes in.
Think of it like a bento box for adults. It’s a collection of small, tasty items. This approach is great for picky eaters too.
Or if you have different cravings throughout the week.
What goes in? Plenty of options! Hard-boiled eggs are protein stars.
Cheese sticks or cubes are easy. Whole-grain crackers pair well with hummus or nut butter. Fresh fruit like grapes, apple slices, or berries.
Veggies like baby carrots, celery sticks, or snap peas. A small portion of nuts or seeds adds healthy fats. You can even add a mini muffin or a small portion of leftover cold chicken.
Creating Your Perfect Snack Box
The beauty of the snack box is its flexibility. There are no strict rules. The goal is variety and satisfaction.
Try to include a protein source. This keeps you full. Add some healthy carbs.
And don’t forget fruits and veggies. A small treat is okay too. It makes the box feel special.
Use a compartmentalized container. This keeps everything separate and neat. It makes opening your lunch a delightful experience.
Snack Box Ideas: A Balanced Mix
Protein: Hard-boiled eggs, cheese cubes, jerky, cooked chicken pieces.
Carbs: Whole-grain crackers, pita bread, mini muffins, small portion of cold pasta.
Fruits: Berries, apple slices, grapes, orange segments.
Veggies: Carrot sticks, cucumber slices, bell pepper strips, cherry tomatoes.
Healthy Fats: Almonds, walnuts, pumpkin seeds, a small avocado.
Sushi Rolls and Onigiri: Eat Them Cold!
Don’t dismiss sushi or onigiri just because they are often associated with specific restaurants. You can easily make these at home. And they are perfect for no-heat lunches.
Making sushi rolls at home might seem intimidating. But with a little practice, it’s quite simple. Use sushi-grade fish if you can.
Or opt for cooked shrimp, crab sticks, or even avocado and cucumber for vegetarian rolls.
Onigiri, or Japanese rice balls, are even easier. They are usually filled with something tasty. Then they are shaped and sometimes wrapped in nori (seaweed).
Common fillings include salted salmon, tuna mayonnaise, or pickled plums. They are incredibly portable. They are also very satisfying.
Make a batch at the start of the week. They are a fun and tasty alternative.
Tips for Making Sushi & Onigiri at Home
For sushi, use short-grain sushi rice. Season it with rice vinegar, sugar, and salt. Get yourself a bamboo rolling mat.
Don’t overfill your rolls. Practice makes perfect. For onigiri, pack the rice firmly.
Wet your hands with salted water to prevent sticking. Experiment with different fillings. They are best eaten within a day or two.
Sushi & Onigiri: Easy Steps
Sushi Rolls:
- Cook and season sushi rice.
- Spread rice on nori.
- Add fillings.
- Roll tightly using a mat.
- Slice with a sharp, wet knife.
Onigiri:
- Shape cooked rice (wet hands help).
- Add filling in the center.
- Reshape to enclose filling.
- Wrap with nori if desired.
Creative Condiments and Dressings
The right sauce or dressing can make or break a no-heat lunch. It adds moisture and flavor. It brings all the ingredients together.
But some dressings can make food soggy. Or they can be too heavy. The key is to choose wisely.
And to pack them correctly.
Consider lighter vinaigrettes. Lemon-based dressings are bright and fresh. Balsamic vinaigrettes pair well with many ingredients.
Tahini dressings add a creamy, nutty flavor. For Asian-inspired bowls, a soy-ginger or peanut dressing is delicious. Always pack your dressing separately.
Use small, leak-proof containers. This ensures your food stays crisp until you are ready to eat. Some meals, like wraps or mason jar salads, can have the dressing mixed in.
But when in doubt, pack it on the side.
Homemade Dressing Ideas
Making your own dressings is easy. It also gives you control over ingredients. A simple vinaigrette: 3 parts olive oil to 1 part vinegar (red wine, balsamic, or apple cider).
Add a pinch of salt, pepper, and a bit of Dijon mustard. For a creamy dressing: mix Greek yogurt with herbs and lemon juice. Or blend avocado with lime juice and a touch of garlic.
Dressing & Condiment Tips
Pack Separately: For salads and grain bowls, use small containers.
Flavor Boosters: Fresh herbs, garlic, spices, citrus zest.
Creamy Options: Greek yogurt, tahini, avocado, cashew butter.
Zesty Choices: Lemon juice, lime juice, vinegar, soy sauce.
Food Safety: Keeping It Cool and Safe
This is super important. Eating food that has been kept at the right temperature is vital. Especially when it’s not cooked.
Make sure your containers are sealed tightly. Use an insulated lunch bag. Pack it with a cold pack or an ice pack.
This helps keep your food cold. Cold food is safer food.
Generally, perishable foods should be kept below 40°F (4°C). And above 140°F (60°C) if hot. Since we are talking no-heat meals, we focus on the cold.
Keep your lunch bag out of direct sunlight. Don’t leave it on a warm windowsill. If you have access to a refrigerator at work, use it.
This is the best way to ensure safety. If in doubt, toss it out. Your health is worth more than saving a meal.
Key Food Safety Practices
- Use Insulated Bags: They help maintain temperature.
- Include Ice Packs: Keep them frozen overnight.
- Seal Containers Tightly: Prevents leaks and contamination.
- Refrigerate When Possible: The safest option.
- Avoid Room Temperature: Don’t let food sit out for too long.
- “When in Doubt, Throw it Out”: A good rule of thumb for safety.
What This Means for Your Workday
Having a stash of no-heat lunch ideas changes things. It means less stress in the morning. It means saving money.
You can actually look forward to your lunch break. It’s a moment of calm. A moment to refuel with food you know is good for you.
This can make your whole afternoon better. You might find you have more energy. You might feel more focused.
It also empowers you. You are in control of your health. You don’t have to rely on outside options.
This is especially true if you have dietary needs. Or if you are trying to eat healthier. These simple meals make it achievable.
They fit into a busy schedule. They are practical. And they are delicious.
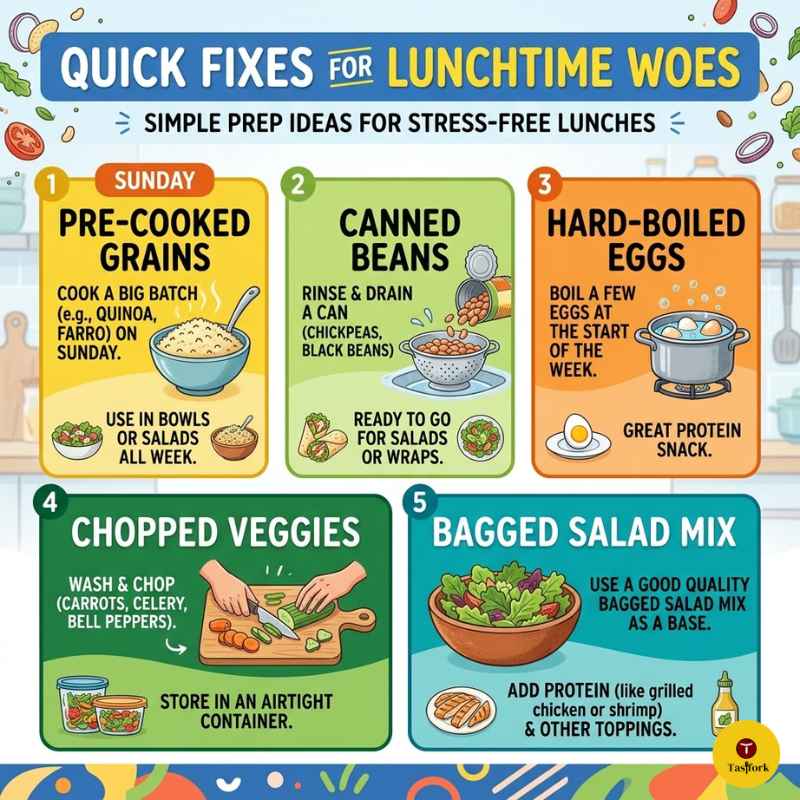
Quick Fixes for Lunchtime Woes
If you’re feeling stuck, here are a few quick ideas to get you going:
- Pre-cooked Grains: Cook a big batch of quinoa or farro on Sunday. Use it all week in bowls or salads.
- Canned Beans: Rinse and drain a can of chickpeas or black beans. They are ready to go for salads or wraps.
- Hard-Boiled Eggs: Boil a few eggs at the start of the week. They make a great protein snack.
- Chopped Veggies: Wash and chop carrots, celery, and bell peppers. Store them in an airtight container.
- Bagged Salad Mix: A good quality bagged salad mix can be a base for a quick lunch. Add protein and other toppings.
Frequently Asked Questions About No-Heat Lunches
What are the best ingredients for no-heat lunches?
Sturdy greens like kale or romaine, cooked grains like quinoa or farro, beans, lentils, hard-boiled eggs, canned tuna or salmon, and root vegetables like carrots and bell peppers are excellent. They hold up well without heat and provide good nutrition.
How long do no-heat meals last?
Most well-prepared no-heat meals can last 3-4 days in the refrigerator. Key is using fresh ingredients and storing them in airtight containers. Always check for freshness before eating.
Can I make pasta salad ahead of time for lunch?
Yes! Pasta salads are ideal for making ahead. Cook pasta al dente, rinse with cold water, and toss with heartier vegetables and a vinaigrette.
Store dressing separately if you prefer to keep it crisp, or mix it in if you like it well-coated.
Are wraps safe to eat cold?
Absolutely. Wraps are designed to be eaten cold. Just make sure your fillings are safe to consume without cooking, like deli meats, pre-cooked chicken, beans, or vegetables.
Hummus and cream cheese are good cold spread options.
What are some good protein sources for no-heat lunches?
Excellent options include chickpeas, black beans, lentils, hard-boiled eggs, canned tuna or salmon, grilled chicken or tofu (cooked ahead), cheese, and nuts or seeds.
How do I prevent my salad from getting soggy in my lunchbox?
Use sturdy greens, pack dressings and wet ingredients like tomatoes separately in small containers, and consider layered jar salads where the dressing is at the bottom, protecting the greens.
Your Lunch, Reimagined
Bringing delicious, no-heat lunches to work is totally doable. It’s about smart planning. It’s about choosing ingredients that shine cold.
Think salads that are hearty, wraps that are full, and bowls that are vibrant. Embrace variety. Keep food safety in mind.
And enjoy a more satisfying, less stressful lunch break. Your midday meal can be a highlight of your day. Happy prepping!