Homemade Pizza Dough Recipe: Easy, Chewy, Restaurant-Style Crust
Homemade pizza dough turns an ordinary weeknight into a cozy pizza night. This easy pizza dough recipe makes two soft, chewy, lightly crisp 12-inch pizza crusts with a golden bottom and airy interior. With simple pantry ingredients, about 20 minutes of prep, and flexible rising options, you can bake Italian-style homemade pizza at home any day of the week.
1. Start With a Reliable Homemade Pizza Dough Recipe
A great homemade pizza dough recipe does not require special equipment or restaurant-level skills. The magic comes from balancing flour, water, yeast, salt, and olive oil so the dough becomes stretchy enough to shape but strong enough to hold toppings. This recipe is designed for two 12-inch pizzas, making it perfect for family dinner, pizza night, or meal prep.
The dough has a mild, slightly nutty flavor from olive oil and develops a beautiful chew after rising. It works especially well for classic Margherita pizza, pepperoni pizza, vegetable pizza, and white pizza. Because the crust bakes crisp underneath while staying tender inside, it feels closer to a pizzeria pizza than a heavy, bread-like homemade version.
For best results, use warm water rather than hot water. Water around 105–110°F (40–43°C) helps activate yeast without damaging it. If you do not have a thermometer, aim for comfortably warm tap water—warm to the touch, never hot.
2. Gather Simple Ingredients for the Best Pizza Dough
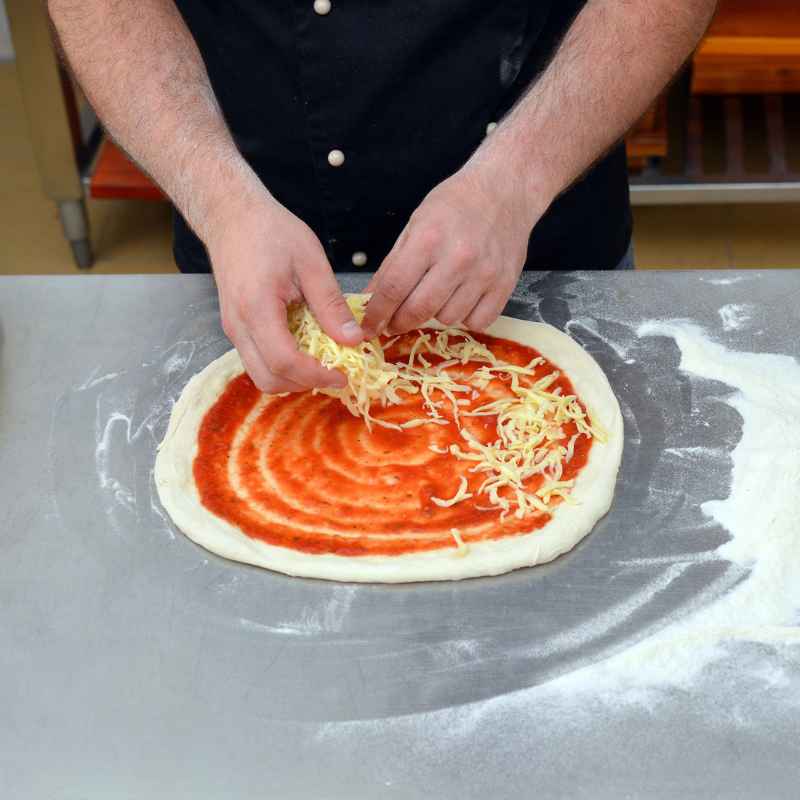
The beauty of easy pizza dough is that it uses ingredients most kitchens already have. Flour creates structure, yeast creates lift, salt improves flavor, olive oil adds tenderness, and a small amount of sugar helps the yeast begin working quickly. You do not need eggs, butter, milk, or complicated additives.
Use the table below as your complete ingredient guide for this homemade pizza dough.
| Ingredient | Quantity | Purpose |
|---|---|---|
| All-purpose flour or bread flour | 4 cups / 500 g | Creates the structure and chew of the crust |
| Instant yeast or active dry yeast | 2 1/4 tsp / 7 g / 1 packet | Helps the dough rise and become airy |
| Warm water, 105–110°F | 1 1/2 cups / 360 ml | Hydrates the flour and activates yeast |
| Olive oil | 2 tbsp / 30 ml | Adds flavor, softness, and browning |
| Sugar | 1 tsp / 4 g | Feeds the yeast and encourages browning |
| Fine salt | 1 1/2 tsp / 9 g | Balances flavor and strengthens the dough |
Bread flour gives the chewiest, most elastic crust, while all-purpose flour produces a slightly softer, more tender pizza base. Both work beautifully, so choose based on what you enjoy. For a more authentic Italian pizza dough texture, use “00” flour if available, but all-purpose flour remains an excellent everyday choice.
3. Activate the Yeast Properly
Yeast is the heart of any pizza dough recipe, and activating it correctly prevents dense, flat crust. If using active dry yeast, stir it into the warm water with the sugar and let it sit for 5–10 minutes until foamy. If using instant yeast, you can mix it directly with the dry ingredients, though blooming it in water still gives you confidence that it is alive.
A foamy, slightly puffy surface means the yeast is active and ready to work. If nothing happens after 10 minutes, the water may have been too hot, too cold, or the yeast may be expired. Starting again with fresh yeast is better than baking a disappointing pizza.
This small waiting period is especially useful for beginner bakers. It removes guesswork and helps ensure your homemade pizza crust rises properly. Once the yeast is bubbly, you are ready to build the dough.
4. Mix and Knead Until Smooth and Elastic
Combine the flour and salt in a large mixing bowl, then add the yeast mixture and olive oil. Stir with a wooden spoon or dough whisk until a shaggy dough forms. Turn it onto a lightly floured surface and knead for 8–10 minutes, or use a stand mixer with a dough hook for 5–7 minutes.
Well-kneaded pizza dough should feel smooth, soft, and slightly tacky—not dry or sticky. Press a fingertip into the dough: it should slowly spring back. This elasticity comes from gluten development, which allows the dough to stretch without tearing when you shape the pizza.
Avoid adding too much extra flour during kneading. A little stickiness is normal, and too much flour can make the finished crust heavy. If the dough sticks badly, add flour one tablespoon at a time; if it feels dry and stiff, add water one tablespoon at a time.
5. Let the Dough Rise for Better Flavor
Place the kneaded dough in a lightly oiled bowl, turn it once to coat, cover it with plastic wrap or a damp towel, and let it rise in a warm spot for 1 to 1 1/2 hours, or until doubled in size. This first rise builds volume and creates the open, airy texture that makes homemade pizza dough so satisfying.
For deeper flavor, choose a cold fermentation method. After the dough rises briefly at room temperature for 30–45 minutes, cover it and refrigerate for 24–48 hours. Slow, cold rising gives the crust a more complex, slightly tangy flavor and often improves its texture. Cold-fermented dough is commonly rested for 24–72 hours depending on the recipe.pizzablab+1
If you are short on time, a same-day rise still works well. At typical room temperature, pizza dough can be ready in several hours, though a longer rise generally produces better flavor and structure.fond+1
6. Divide, Shape, and Rest the Dough Balls
Once risen, gently deflate the dough and divide it into two equal portions, about 440–450 g each. Shape each portion into a tight ball by pulling the edges toward the center and turning the dough against the counter. Tight balls relax into smoother, easier-to-stretch pizza bases.
Cover the dough balls with a towel or loosely with plastic wrap and let them rest for 15–20 minutes. This short rest relaxes the gluten, making the dough much easier to stretch without snapping back. Skipping this step often leads to frustrating, elastic dough that keeps shrinking.
For make-ahead pizza dough, place each ball in a separate lightly oiled container or wrap it well. Refrigerate for up to 48 hours, or freeze for up to 3 months. Refrigerated dough benefits from extra flavor, while frozen dough should thaw overnight in the refrigerator before use.lcbo+1
7. Stretch the Dough Without a Rolling Pin
Press the center of the dough gently with your fingertips, leaving a slightly thicker edge for the crust. Then lift the dough and let gravity gently stretch it, rotating it as it lengthens. This method preserves air bubbles in the dough, which bake into those desirable airy pockets.
A rolling pin is convenient, but it presses out too much air and can create a dense crust. For a light, pizzeria-style pizza crust, hand stretching is worth learning. If the dough resists, cover it and wait another 5–10 minutes; relaxed dough stretches far more easily.
Transfer the stretched dough to a parchment-lined baking sheet, pizza pan, or preheated pizza stone. Keep the base thin in the center and slightly thicker around the edges for a classic homemade pizza shape.
8. Bake Hot for a Crispy, Golden Crust
High heat is essential for great homemade pizza dough. Preheat your oven to 475–500°F (245–260°C) for at least 30 minutes, and longer if using a pizza stone or steel. A very hot oven helps the bottom crisp quickly while the toppings cook and the cheese melts.
Bake the pizza for 10–14 minutes, depending on thickness, toppings, and your oven. The crust should be deeply golden underneath, the cheese bubbly, and the edges lightly charred in places. If using a pizza stone, slide the parchment directly onto the hot stone for the best bottom crust.
For extra-crisp results, bake the plain stretched dough for 4–5 minutes before adding toppings. This par-baking method is helpful for wet toppings such as fresh mozzarella, mushrooms, or barbecue sauce.
9. Customize Your Pizza Dough for Different Styles
This base recipe adapts easily to different pizza styles. For a thin crispy pizza crust, divide the dough into three smaller portions and roll or stretch each one thinner. For a thick pan pizza, press one dough ball into an oiled rectangular pan and allow it to rise again for 20–30 minutes before topping.
| Pizza Style | Dough Amount | Best Method | Result |
|---|---|---|---|
| Thin crust | 1/3 of batch | Stretch very thin, bake hot | Crisp, cracker-like base |
| Classic hand-tossed | 1/2 of batch | Hand stretch, bake on stone or steel | Chewy, airy crust |
| Pan pizza | 1/2 of batch | Press into oiled pan, brief second rise | Soft, golden, slightly fried bottom |
| Grilled pizza | 1/2 of batch | Grill dough briefly, add toppings, finish | Smoky, blistered crust |
| Calzone | 1/2 of batch | Fill, fold, seal, bake | Stuffed, portable pizza pocket |
You can also add flavor directly to the dough. A teaspoon of dried oregano, Italian seasoning, garlic powder, or chili flakes creates a more aromatic crust. Brush the baked edges with olive oil and sprinkle with flaky salt for a bakery-style finish.
10. Store, Freeze, and Reheat Pizza Dough Correctly
Good storage makes homemade pizza dough a true meal-prep ingredient. In the refrigerator, keep dough balls in lightly oiled airtight containers for up to 48 hours. The flavor improves as it rests, but the dough will eventually over-ferment and become difficult to shape.
To freeze, wrap each dough ball tightly in plastic wrap, then place it in a freezer bag. Freeze for up to 3 months. Thaw overnight in the refrigerator, then let the dough sit at room temperature for 1–2 hours before stretching.
Leftover baked pizza reheats best in a skillet or hot oven rather than a microwave. A hot skillet restores crispness to the bottom, while a brief cover helps the cheese melt again. This makes homemade pizza just as enjoyable the next day.

Frequently Asked Questions (FAQs)
Can I make homemade pizza dough without a stand mixer?
Yes. Mix the ingredients with a spoon, then knead by hand for 8–10 minutes until smooth and elastic. A stand mixer simply makes the process easier.
Can I use all-purpose flour instead of bread flour?
Absolutely. All-purpose flour makes a tender, slightly softer crust, while bread flour creates more chew and structure. Both produce excellent homemade pizza.
How do I know when pizza dough has risen enough?
It should look visibly puffy and roughly double in size. Gently poke it with a floured finger; the indentation should slowly spring back.
Why is my pizza dough sticky?
Sticky dough usually means the flour needs a little more time to absorb water or the dough needs more kneading. Add flour only one tablespoon at a time so the crust does not become dense.
Can I make pizza dough ahead of time?
Yes. Refrigerate the shaped dough balls for up to 48 hours or freeze them for up to 3 months. Cold fermentation also improves the flavor.
What oven temperature is best for homemade pizza?
Bake at 475–500°F (245–260°C). A very hot oven creates a crisp bottom, blistered edges, and properly melted cheese.
Conclusion
This homemade pizza dough recipe proves that restaurant-quality pizza does not require a wood-fired oven or complicated techniques. With flour, yeast, water, olive oil, salt, and a little patience, you can create a chewy, golden pizza crust that works for thin-crust pizzas, pan pizzas, calzones, and weekend pizza nights.
The real value of this recipe is its flexibility: make it fresh in under two hours, refrigerate it for better flavor, or freeze individual dough balls for effortless future meals. Save this post, try the dough this week, and experiment with your favorite toppings. For more easy, family-friendly recipes and kitchen inspiration, follow along and explore the related recipe posts.