

10 Easy Halloween Recipes for Spooky Fun
Halloween recipes don’t have to be complicated to be fun and festive. Whether you’re hosting a party, packing a lunch for school, or just looking for a creative way to celebrate the season, these easy recipes will delight ghouls and goblins of all ages. From spooky appetizers to terrifyingly tasty treats, we’ve got you covered for a frightfully good time without the stress of complex cooking.
This guide brings you a collection of simple, crowd-pleasing Halloween recipes that require minimal effort but deliver maximum spooky impact. Get ready to impress your guests with dishes that are as fun to make as they are to eat, ensuring your Halloween celebration is a delicious success.
Simply put, these 10 easy Halloween recipes offer a perfect blend of spooky fun and simplicity, using common ingredients and straightforward steps to create memorable treats and snacks for any Halloween gathering.
Key Takeaways
- Easy Halloween recipes focus on visual appeal with minimal preparation time.
- These recipes utilize common ingredients and readily available tools for convenience.
- The collection spans savory snacks, sweet treats, and fun beverages suitable for parties or family nights.
- Halloween recipes are categorized for quick selection based on meal type (appetizer, dessert, snack).
- Emphasis is placed on creative presentation to achieve a spooky, festive theme.
1. Spooky Spiderweb Dip
This appetizer is a guaranteed hit at any Halloween party. It’s visually striking and incredibly simple to assemble, making it perfect for a last-minute addition to your spread. The creamy dip base is versatile, and the spiderweb design adds just the right amount of spooky flair.
The key to this recipe is the contrasting colors and textures. A smooth, cool dip topped with a dark, savory web creates an irresistible appetizer that guests will be eager to dig into. It’s a fun way to make a simple snack feel extraordinarily festive.
How to Create the Spiderweb Dip
- Prepare your favorite creamy dip. A classic spinach-artichoke dip, a simple cream cheese and sour cream mixture, or even guacamole works wonderfully.
- Spread the dip evenly into a shallow serving bowl or platter. Aim for a smooth surface for the best web effect.
- In a separate small bowl, mix a tablespoon of black olive tapenade or finely minced black olives with a teaspoon of olive oil to create a spreadable, dark paste.
- Transfer the olive mixture to a piping bag with a small, round tip, or use a small zip-top bag with a corner snipped off.
- Pipe concentric circles of the olive mixture onto the surface of the dip, starting from the center and working outwards.
- Using a toothpick or the tip of a knife, gently drag lines from the center of the dip outwards through the circles to create the spiderweb effect.
- Serve immediately with your favorite dippers.
Tips for the Best Spiderweb Dip
- Use a dip that is relatively firm to hold the shape of the web.
- Ensure your olive mixture is smooth enough to pipe easily.
- Practice the web design on a small section before committing to the whole dip.
- Offer a variety of dippers like tortilla chips, pita bread, crackers, or vegetable sticks.
Best For: Appetizer, party snack, potluck contribution.
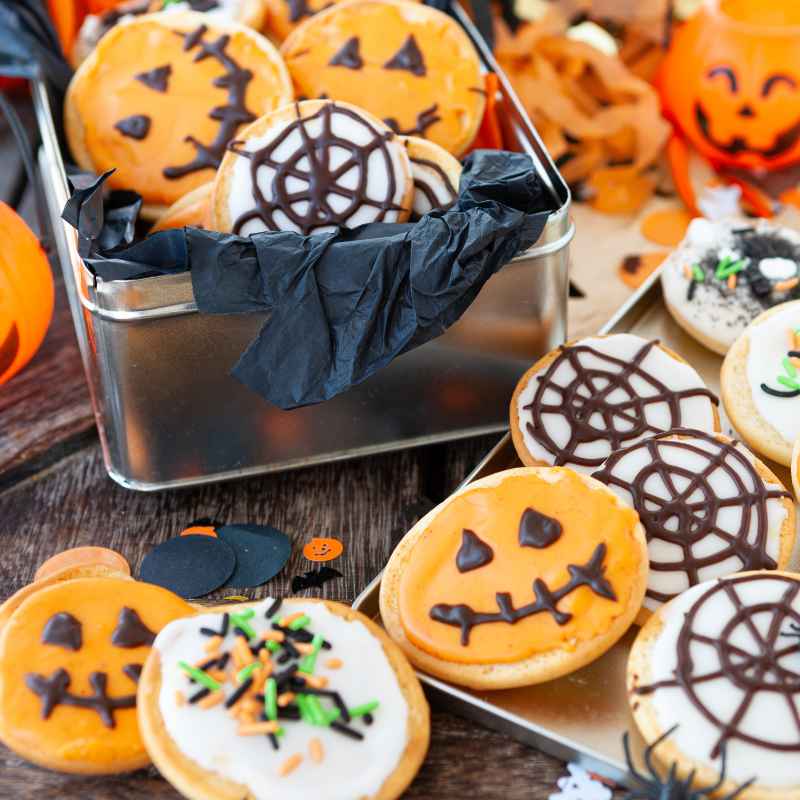
2. Ghostly Meringue Cookies
These ethereal ghost meringue cookies are as charming as they are delicious. Their light, airy texture and subtle sweetness make them a delightful treat, and their whimsical ghost shape is perfectly suited for Halloween. They are surprisingly simple to make, requiring just a few basic ingredients and a bit of patience.
Meringue cookies are a fantastic option for those looking for a gluten-free and low-calorie sweet. The key is to whip the egg whites to stiff peaks and bake them at a low temperature to achieve their signature crispiness without browning. The edible eyes add a touch of personality to each ghostly creation.
Ghostly Meringue Ingredients
- 4 large egg whites, room temperature
- 1 cup superfine granulated sugar (or regular granulated sugar pulsed in a food processor)
- 1/2 teaspoon vanilla extract
- Pinch of cream of tartar (optional, for stability)
- Edible black decorating eyes or tiny dots of black food coloring
Creating Your Ghostly Confections
- Preheat your oven to 200°F (95°C). Line baking sheets with parchment paper.
- In a clean, dry bowl, whip the egg whites with an electric mixer on medium speed until foamy. Add the cream of tartar if using.
- Gradually add the superfine sugar, one tablespoon at a time, while continuing to beat on high speed. Continue beating until stiff, glossy peaks form and the sugar is completely dissolved.
- Gently stir in the vanilla extract.
- Spoon or pipe the meringue onto the prepared baking sheets, shaping each one into a ghostly form with a slightly wider base and a tapered top. Use two spoons to create a more defined ghost shape if desired.
- If using edible eyes, gently press them into the meringue before baking. Alternatively, bake them plain and add eyes with black icing or food coloring after they cool.
- Bake for 60-90 minutes, or until the meringues are dry and lift easily from the parchment paper.
- Turn off the oven, prop the door open slightly with a wooden spoon, and let the meringues cool completely inside the oven. This helps prevent cracking.
Best For: Desserts, party favors, gluten-free sweet treat.
3. Monster Mouth Apple Bites
These monster mouth apple bites are a healthy and fun snack that kids will adore making and eating. They combine the natural sweetness of apples with creamy peanut butter and crunchy “teeth,” creating a whimsical treat that requires no baking. It’s a fantastic way to get children involved in the kitchen while celebrating Halloween.
The beauty of this recipe lies in its simplicity and adaptability. You can swap out the peanut butter for almond butter or sunflower seed butter, and experiment with different fruits or nuts for the “teeth.” The vibrant colors and playful presentation make them irresistible for little monsters.
What You’ll Need for Monster Mouths
- Apples (any variety you prefer)
- Peanut butter (or alternative nut/seed butter)
- Slivered almonds, sunflower seeds, or small pieces of apple for “teeth”
- Optional: Strawberry slices or fruit leather for “tongues”
- Optional: Small candies or edible googly eyes for extra flair
Assembling Your Apple Monsters
- Wash and core the apples.
- Cut each apple horizontally into thick slices, about 1/2 inch thick.
- Spread a generous layer of peanut butter onto one side of each apple slice. This will be the base of the mouth.
- Arrange your chosen “teeth” along the edge of the peanut butter spread on one apple slice. For a classic monster mouth, use slivered almonds or sunflower seeds placed upright to resemble teeth.
- If using, place a strawberry slice or fruit leather piece on top of the peanut butter as a “tongue.”
- Top with another apple slice, peanut butter side down, to create a “sandwich” or leave it open-faced for a more dramatic monster.
- Add edible googly eyes or small candy accents if desired for extra character.
| Ingredient Swap Ideas | Description |
|---|---|
| Almond Butter | Nutty and creamy alternative for those avoiding peanuts. |
| Sunflower Seed Butter | Great nut-free option, offers a slightly earthier flavor. |
| Banana Slices | Can be used for “teeth” or as a softer filling. |
| Mini Marshmallows | For a softer, sweeter “teeth” alternative. |
These ingredient swaps allow for customization to suit dietary needs and taste preferences.
Best For: Healthy snacks, kids’ parties, creative lunches.
4. Bewitched Brownies
Elevate your basic brownie recipe with a touch of Halloween magic! These bewitched brownies start with your favorite boxed or homemade brownie mix and are transformed into a festive dessert with simple frosting and candy decorations. They are decadent, easy to prepare, and incredibly satisfying for any chocolate lover.
The key here is the visual transformation. A simple swirl of orange and black frosting, along with some strategically placed candy eyeballs, turns ordinary brownies into something special. They offer a rich chocolate flavor that pairs perfectly with the sweet frosting, making them a delightful centerpiece for your Halloween dessert table.
Making Your Brownies Bewitching
- Start with your favorite brownie recipe or a boxed brownie mix. Prepare and bake according to package directions.
- Let the brownies cool completely before decorating. This is crucial for the frosting to set properly.
- Prepare or purchase orange and black frosting. Buttercream or cream cheese frosting works well.
- Using piping bags with star tips, or simply spreading with a knife, create swirls or patterns of orange and black frosting over the cooled brownies. You can alternate colors or create marbled effects.
- Immediately before the frosting sets, press edible candy eyeballs into the frosting to give your brownies a spooky, watchful gaze.
- For an extra touch, you can sprinkle with Halloween-themed edible glitter or sprinkles.
Variations for Bewitched Brownies
- Ghostly Brownies: Frost with white icing and use black icing to draw simple ghost faces.
- Pumpkin Patch Brownies: Use orange frosting and add green frosting “stems” to make mini pumpkin patches.
- Graveyard Brownies: Top with crushed chocolate cookies (dirt), then add candy pumpkins and candy gravestones.
- Spiderweb Brownies: Frost with chocolate or dark icing, then use white icing to pipe a spiderweb pattern.
Best For: Desserts, parties, family baking projects.
5. Mummy Hot Dogs
These mummy hot dogs are an incredibly simple and fun savory snack that kids (and adults!) can’t get enough of. They’re made by wrapping hot dogs in strips of crescent roll dough, baking them until golden, and adding a couple of dots of mustard or ketchup for eyes. They are a perfect addition to any Halloween party buffet or for a spooky weeknight dinner.
The magic of mummy hot dogs is in their visual transformation from ordinary ingredients into something undeniably festive. The flaky, buttery crescent roll dough becomes the “bandages,” and the hot dog peeking through adds a playful touch. They are quick to assemble and bake, making them an ideal last-minute Halloween recipe.
How to Wrap Your Mummies
- 1 (8-ounce) can refrigerated crescent rolls
- 16 hot dogs or cocktail wieners
- Mustard or ketchup for eyes
- Preheat your oven to 375°F (190°C). Line a baking sheet with parchment paper.
- Unroll the crescent roll dough and separate it into triangles.
- For each hot dog, cut a triangle into thin strips (about 1/2 inch wide).
- Drape and wrap the dough strips around each hot dog, leaving a small gap at the top for the “face.” Overlap the strips slightly to create a mummy-like effect.
- Place the wrapped hot dogs on the prepared baking sheet.
- Bake for 12-15 minutes, or until the crescent roll dough is golden brown and puffed.
- Remove from the oven and let cool slightly.
- Use dots of mustard or ketchup to create eyes for each mummy hot dog.
Best For: Appetizers, party snacks, quick dinners, kids’ lunches.
6. Spooky Worms in Dirt Cups
This classic Halloween treat is a simple yet effective dessert that brings a smile to everyone’s face. Spooky worms in dirt cups are made by layering chocolate pudding with crushed chocolate cookies and topping them with gummy worms. They are easy to assemble in individual cups, making them perfect for party favors or a fun, no-fuss dessert.
The appeal of this dessert lies in its playful presentation and delicious combination of textures and flavors. The rich chocolate pudding, the “dirt” from crushed cookies, and the wiggly gummy worms create a miniature, edible scene that’s both fun and satisfying. This is a recipe that requires minimal skill but offers maximum festive impact.
Creating Your Dirt Cups
- 1 package (3.4 oz) instant chocolate pudding mix
- 2 cups cold milk
- 1 package (approx. 14 oz) chocolate sandwich cookies (like Oreos)
- Gummy worms
- Small clear cups or jars
- Prepare the chocolate pudding according to package directions, using the cold milk. Let it set in the refrigerator for at least 5 minutes.
- While the pudding sets, place the chocolate sandwich cookies in a zip-top bag and crush them into coarse crumbs using a rolling pin or mallet. Leave some larger chunks for texture.
- Spoon a layer of crushed cookie “dirt” into the bottom of each clear cup.
- Spoon a layer of set chocolate pudding over the cookie crumbs.
- Add another layer of cookie crumbs.
- Top with a final layer of pudding, or another layer of cookie crumbs if you prefer.
- Gently insert a few gummy worms into the pudding and cookie layers, letting some “crawl” out of the top.
- Chill for at least 30 minutes before serving to allow flavors to meld and pudding to firm up.
| Decoration Ideas | Description |
|---|---|
| Candy Eyeballs | Add a few eyes peeking out of the dirt for a creepy effect. |
| Chocolate Frosting | Pipe small dollops or swirls for a more varied “earthy” texture. |
| Gummy Spiders | Swap or add gummy spiders alongside the worms for extra Halloween creepiness. |
| Edible Moss | Sprinkle a little green cake or cookie crumble on top for a mossy effect. |
These creative additions can make your dirt cups even more visually engaging for Halloween.
Best For: Desserts, kids’ parties, Halloween treat bags.
7. Ghostly Pizza Bites
Turn a universally loved snack into a Halloween masterpiece with these ghostly pizza bites. They use simple ingredients like mini pizza crusts, sauce, cheese, and olives, making them incredibly easy to assemble. The creative part is shaping the olives into little ghosts, adding a festive touch to a classic favorite.
These mini pizzas are perfect for a party appetizer or a fun family dinner. The savory combination of warm dough, tangy sauce, melted cheese, and the salty olives creates a delicious bite that’s hard to resist. They’re quick to bake and always a crowd-pleaser, embodying the spirit of easy Halloween recipes.
Creating Your Ghostly Pizzas
- 1 package mini pizza crusts or English muffins, halved
- 1/2 cup pizza sauce
- 1 cup shredded mozzarella cheese
- 1/4 cup sliced black olives
- Preheat your oven to 400°F (200°C). Place the mini pizza crusts or English muffin halves on a baking sheet.
- Spread a thin layer of pizza sauce over each crust, leaving a small border for the crust.
- Sprinkle a generous amount of mozzarella cheese over the sauce.
- For the ghost shapes, take two slices of black olive for each pizza. Cut a small sliver from the top of each olive slice to create a ghost-like outline. Place these on top of the cheese. You can use small pieces of olive for the eyes if desired, or leave them off for a simpler ghost.
- Bake for 8-10 minutes, or until the cheese is melted and bubbly, and the crust is golden brown.
- Let cool slightly before serving.
Best For: Appetizers, party snacks, quick lunches, family dinners.
8. Batty Banana Smoothies
Add a spooky beverage to your Halloween lineup with these batty banana smoothies. They’re made with dark fruit for a mysterious color and a hint of banana for sweetness and creamy texture. A simple paper bat decoration transforms a regular smoothie into a festive Halloween drink that’s both healthy and fun.
The beauty of this recipe is its simplicity and the visual effect. You can adjust the fruits based on what you have available, but darker berries like blueberries or blackberries will give you the best “batty” color. It’s a refreshing and nutritious option to balance out all the sugary Halloween treats.
Ingredients for Batty Smoothies
- 1 ripe banana, frozen
- 1 cup frozen mixed berries (blueberries, blackberries, raspberries)
- 1/2 cup milk (dairy or non-dairy)
- 1/4 cup plain or vanilla yogurt
- Optional: 1 tablespoon honey or maple syrup for added sweetness
- Optional: Black food coloring for deeper color
- Paper bat cutouts or edible decorations
Blending Your Spooky Concoction
- Combine the frozen banana, frozen mixed berries, milk, and yogurt in a blender.
- Blend on high speed until smooth and creamy. If the smoothie is too thick, add a little more milk.
- If you want a deeper, more mysterious color, add a drop or two of black food coloring and blend again until evenly distributed.
- Taste and add honey or maple syrup if you prefer a sweeter smoothie.
- Pour the smoothie into glasses.
- Garnish each glass with a paper bat cutout attached to the rim, or use edible spider or bat sprinkles on top.
| Fruit Options | Notes |
|---|---|
| Blackberries | Provide a deep purple hue and tartness. |
| Blueberries | Excellent for color, naturally sweet. |
| Cherries (pitted) | Can add a rich red or purplish tint. |
| Dark Grapes | Contribute to the dark, mysterious color. |
Experimenting with different dark fruits can yield unique flavor profiles and color variations for your Halloween smoothies.
Best For: Festive drinks, healthy snacks, parties.
9. Stuffed Mushroom Eyeballs
These stuffed mushroom eyeballs are a savory and surprisingly spooky appetizer that will impress your guests. They start with simple stuffed mushrooms and are elevated with a creative presentation using mozzarella and black olives to mimic creepy eyeballs. They’re relatively easy to make and offer a satisfying, savory flavor profile.
The key to these “eyeballs” is the texture and the visual deception. The tender mushroom cap, the flavorful filling, and the melted cheese create a delicious base, while the mozzarella and olive “pupil” add a distinct, eerie look. They are perfect for a more sophisticated Halloween spread without being overly complicated.
Preparing Your Mushroom Eyeballs
- 12-16 medium-sized mushrooms (cremini or button work well)
- 1 tablespoon olive oil
- 1/4 cup finely chopped onion
- 1 clove garlic, minced
- 1/2 cup breadcrumbs
- 1/4 cup grated Parmesan cheese
- 2 tablespoons chopped fresh parsley
- Salt and black pepper to taste
- 12-16 slices of fresh mozzarella (about 1-inch squares)
- 12-16 pitted black olives, halved lengthwise
- Preheat your oven to 375°F (190°C).
- Gently clean the mushrooms and remove the stems. Finely chop the stems.
- Heat olive oil in a skillet over medium heat. Add the chopped mushroom stems and onion, and sauté until softened, about 5 minutes.
- Add the minced garlic and cook for another minute until fragrant.
- Remove from heat and stir in the breadcrumbs, Parmesan cheese, parsley, salt, and pepper. Mix well.
- Spoon the filling generously into each mushroom cap.
- Place a slice of fresh mozzarella on top of the filling in each mushroom.
- Bake for 15-20 minutes, or until the mushrooms are tender and the cheese is melted and lightly golden.
- Remove from the oven and carefully place a halved black olive on top of each mozzarella slice to create the “pupil.”
- Serve warm.
Best For: Appetizers, party snacks, Halloween gatherings.
10. Monster Cookie Energy Balls
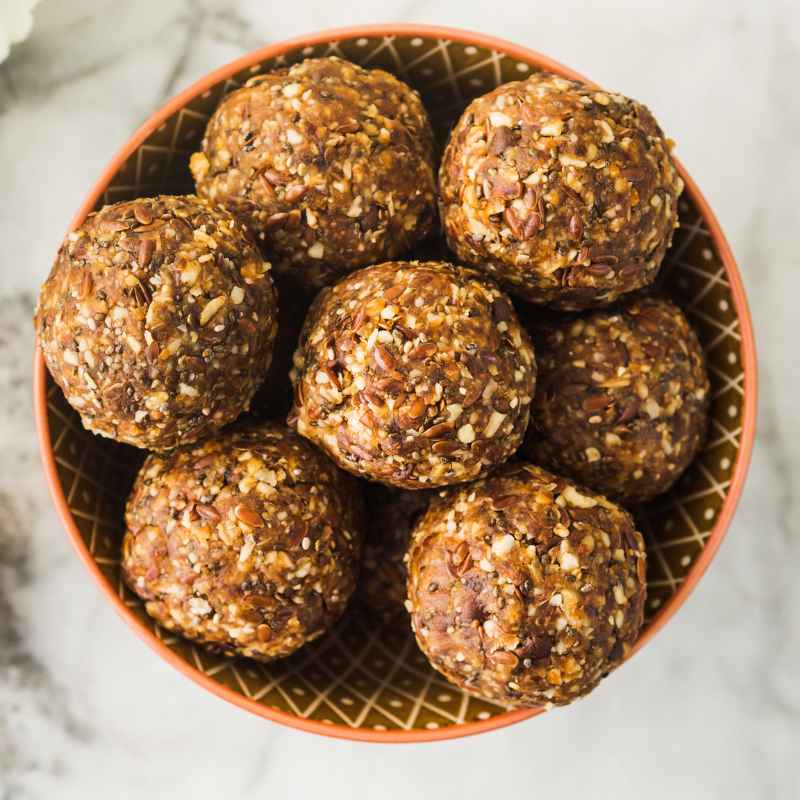
These no-bake monster cookie energy balls are a fantastic way to get a healthy boost while enjoying a festive treat. They are made with simple, wholesome ingredients like oats, peanut butter, and a touch of sweetness, then decorated to resemble mini monsters. They require no baking, making them super quick and easy for last-minute preparations.
The charm of these energy balls lies in their adaptability and their fun, monstrous appearance. You can customize the mix-ins and coatings to create a variety of “monster” looks, from sprinkles to mini chocolate chips. They are a great option for a healthier Halloween snack that still feels indulgent and festive.
Ingredients for Monster Energy Balls
- 1 cup rolled oats
- 1/2 cup peanut butter (or any nut/seed butter)
- 1/3 cup honey or maple syrup
- 1/4 cup mini chocolate chips
- 1 teaspoon vanilla extract
- Optional: 2 tablespoons chia seeds or ground flaxseed for added nutrition
- Assorted sprinkles (Halloween colors), mini chocolate chips, shredded coconut for decoration
Rolling Your Monster Creations
- In a medium bowl, combine the rolled oats, peanut butter, honey or maple syrup, mini chocolate chips, vanilla extract, and any optional seeds.
- Stir until all ingredients are well combined and a dough forms. If the mixture seems too dry, add a teaspoon of peanut butter or honey at a time. If too wet, add a tablespoon more oats.
- Chill the mixture in the refrigerator for about 15-30 minutes. This makes it easier to roll.
- Once chilled, roll the dough into small balls, about 1 inch in diameter.
- Roll the balls in your chosen decorations: Halloween-colored sprinkles, mini chocolate chips arranged like eyes, or shredded coconut for a fuzzy texture.
- Place the finished energy balls on a plate or baking sheet lined with parchment paper.
- Refrigerate for at least 30 minutes to allow them to firm up. Store in an airtight container in the refrigerator.
Best For: Healthy snacks, lunchboxes, party treats.
Frequently Asked Questions
Are these Halloween recipes suitable for children to make?
Yes, many of these recipes are very child-friendly. Tasks like spreading, decorating, and mixing are great for kids to help with, especially the Monster Mouths, Mummy Hot Dogs, and Dirt Cups. Adult supervision is recommended for any steps involving knives or ovens.
What are the easiest Halloween recipes for beginners?
The Mummy Hot Dogs, Ghostly Pizza Bites, and Worms in Dirt Cups are generally the easiest for beginners due to their minimal ingredients and straightforward assembly. Ghostly Meringue Cookies and Stuffed Mushroom Eyeballs require a bit more attention to detail but are still manageable.
Can I make these recipes ahead of time?
Many of these recipes can be prepared partially or fully in advance. Brownies and meringue cookies can be baked a day or two ahead. Energy balls and dirt cups can be assembled a day in advance and kept refrigerated.
Spiderweb dip is best assembled closer to serving time to maintain the web’s crispness.
Are there any nut-free Halloween recipe options?
Yes, the Mummy Hot Dogs, Ghostly Pizza Bites, Ghostly Meringue Cookies, and Batty Banana Smoothies are naturally nut-free. For the Monster Mouths and Energy Balls, substitute peanut butter with sunflower seed butter or a nut-free spread. Always check your ingredients for cross-contamination warnings.
How can I make these Halloween recipes more visually spooky?
Focus on the decorations! Use Halloween-themed cookie cutters for shapes, black and orange colors for frosting and garnishes, edible googly eyes, and creative arrangements. Even simple recipes like pizza bites or hot dogs can become “spooky” with a little imagination and the right edible accents.
Final Thoughts
Creating memorable Halloween treats doesn’t require hours in the kitchen or advanced culinary skills. These 10 easy Halloween recipes prove that simple ingredients and a touch of creativity can lead to spooktacularly delicious results. From savory bites to sweet delights, you have a versatile collection to make your Halloween celebration a festive and frightfully good time for everyone involved.


