Easy Veg Kabab Recipe That’s Crispy Outside, Soft Inside
Veg Kabab Recipe has become my go-to when I want something that feels special yet stays simple. I have made this Easy Veg Kabab Recipe That’s Crispy Outside, Soft Inside more times than I can count, and it never disappoints. The outside turns beautifully golden and crisp while the inside stays soft and full of flavor. If you have been looking for a reliable way to enjoy restaurant-style vegetable kababs at home, you are in the right place.
I still remember the first time I pulled a tray of these out of the oven. The smell alone made everyone in the kitchen stop what they were doing. That perfect contrast between the crunchy exterior and the tender center is what keeps me coming back. This version uses everyday vegetables and pantry spices, so you do not need any hard-to-find items. Whether you are cooking for a weeknight dinner or hosting friends, this kabab recipe veg delivers every single time.
Why This Kabab Recipe Veg Works So Well
The secret sits in the balance of moisture and binding. Too much water and the kababs fall apart. Too little and they turn dry. I learned this the hard way after a few early batches that either crumbled or felt heavy. Now I squeeze the grated vegetables properly and add just enough chickpea flour and breadcrumbs. The result is a mixture that holds its shape yet stays light.
Spices do the heavy lifting for flavor. Cumin, coriander, garam masala, and a touch of chili give depth without overwhelming the natural sweetness of the vegetables. A little lemon juice brightens everything. When you cook them correctly, the outside develops a thin crust while the inside remains soft and almost melt-in-your-mouth. That is exactly what the title promises, and it is what you get when you follow the method carefully.
Ingredients You Will Need
Here is everything I use for about twelve to fourteen medium kababs. These amounts work for four people as a main dish or six as an appetizer.
- 2 medium potatoes, boiled and mashed
- 1 cup grated carrot, squeezed dry
- 1 cup finely chopped cabbage or grated zucchini, squeezed dry
- ½ cup finely chopped green beans or peas
- 1 small onion, finely chopped
- 2 green chilies, finely chopped (optional)
- 1 tablespoon grated ginger
- 2 garlic cloves, minced
- 3 tablespoons chickpea flour (besan)
- ¼ cup breadcrumbs, plus extra for coating
- 1 teaspoon cumin powder
- 1 teaspoon coriander powder
- ½ teaspoon garam masala
- ½ teaspoon red chili powder or paprika
- ½ teaspoon turmeric
- Salt to taste
- 1 tablespoon lemon juice
- 2 tablespoons chopped cilantro
- 2 tablespoons oil for cooking, plus more for brushing
I always boil the potatoes a day ahead when possible. Cold mashed potato binds better and keeps the mixture from becoming sticky. Squeezing the carrot and cabbage is non-negotiable. I put them in a clean kitchen towel and wring hard until almost no liquid comes out. That single step makes the biggest difference between success and disappointment.
Step-by-Step Method for Perfect Results
Start by preparing the vegetables. Boil the potatoes until soft, peel them, and mash until smooth. Let them cool completely. Grate the carrot and cabbage, then squeeze out every drop of moisture you can. Chop the green beans or peas very small so they cook through quickly.
Heat a teaspoon of oil in a pan. Add the onion, green chili, ginger, and garlic. Cook for three to four minutes until the onion softens and the raw smell disappears. Add the chopped green beans or peas and cook another two minutes. Turn off the heat and let the mixture cool.
In a large bowl combine the mashed potato, squeezed carrot and cabbage, cooked onion mixture, chickpea flour, breadcrumbs, all the spices, salt, lemon juice, and cilantro. Mix with your hands. The warmth of your hands helps everything come together. The mixture should feel soft but hold its shape when pressed. If it feels too wet, add another tablespoon of breadcrumbs. If it feels dry, add a teaspoon of water or a little more mashed potato.
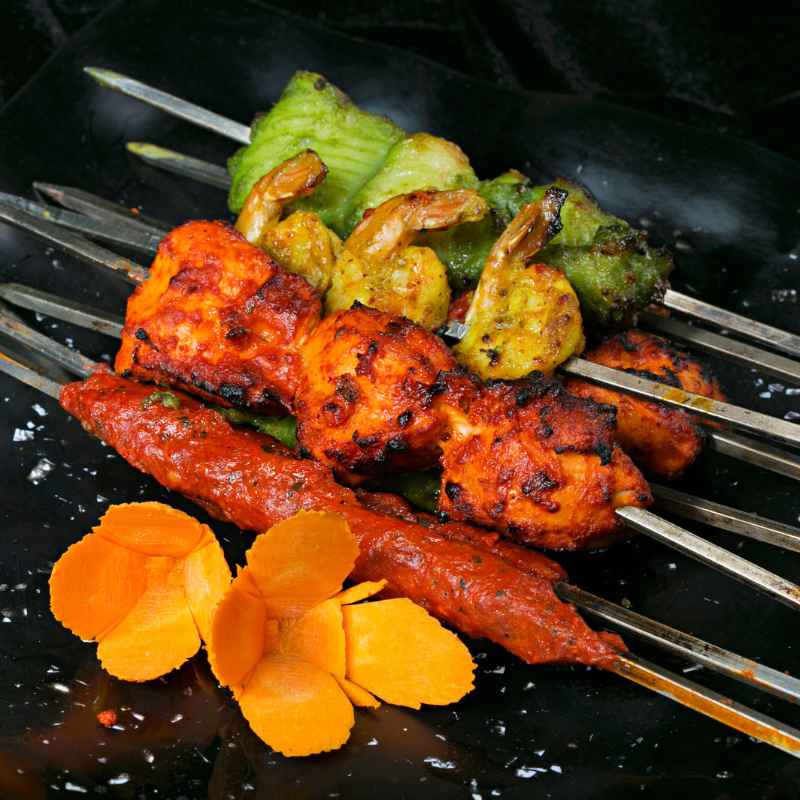
Shape the mixture into small logs or flat oval patties, whichever shape you prefer. I like the log shape because it looks more like traditional seekh kababs. Press firmly so there are no air pockets. Roll each one lightly in breadcrumbs for extra crispness.
Now choose your cooking method. For the crispiest result I prefer shallow frying. Heat two tablespoons of oil in a non-stick pan over medium heat. Place the kababs in a single layer and cook three to four minutes per side until deep golden. Turn them gently with a spatula. Do not rush. Medium heat gives the outside time to crisp while the inside cooks through.
Oven method works beautifully too. Preheat to 400°F. Place the kababs on a parchment-lined baking sheet, brush lightly with oil, and bake for 18 to 22 minutes, flipping halfway. For even more crunch, switch to broil for the last two minutes, watching carefully so they do not burn.
Air fryer fans will love this version. Preheat to 375°F. Brush the kababs with oil, place in a single layer, and cook 12 to 15 minutes, shaking the basket halfway. They come out wonderfully crisp with almost no oil.
Tips That Guarantee Crispy Outside and Soft Inside
Temperature control is everything. High heat burns the outside before the center sets. Low heat makes them absorb oil and turn greasy. Medium heat is your friend.
Do not overcrowd the pan. Crowding drops the temperature and steams the kababs instead of frying them. Cook in batches if needed.
Let the shaped kababs rest in the refrigerator for twenty minutes before cooking. This firms them up and reduces the chance of breaking.
A light coating of breadcrumbs or even crushed cornflakes adds an extra layer of crunch without changing the flavor.
If you want them softer inside, do not overcook. Once the outside is golden, they are ready. The residual heat finishes the job.
Variations I Love to Make
Sometimes I add a handful of grated paneer or crumbled tofu for extra protein. The texture becomes even creamier inside.
For a smoky note, I mix in a pinch of smoked paprika or a drop of liquid smoke. It reminds me of outdoor grilling even when I cook indoors.
Spinach and corn make a colorful version. Just squeeze the spinach very well and mix it in with the other vegetables.
If you prefer milder flavors, reduce the chili and increase the cumin. Kids usually love that version.
For a gluten-free batch, skip the breadcrumbs and use extra chickpea flour or crushed rice cereal for coating.
How I Serve These Kababs
I almost always make a simple yogurt dip. Mix plain yogurt with a little salt, roasted cumin powder, and chopped mint or cilantro. The cool creaminess balances the spices perfectly.
Mint chutney is another favorite. Fresh mint, cilantro, green chili, lemon juice, and a pinch of salt blended together create a bright green sauce that wakes up every bite.
On the side I serve sliced onions, lemon wedges, and sometimes a simple cucumber salad. Warm naan or soft pita makes it a complete meal. For a lighter plate, I put the kababs over a bed of mixed greens with a light lemon dressing.
These also work great as party appetizers. I stick a small skewer through each one and arrange them on a platter with the dips in the middle. Guests always go back for more.
Storage and Make-Ahead Tips
The uncooked mixture keeps well in the refrigerator for up to a day. Shape the kababs, place them on a plate, cover, and chill. Cook them when you are ready.
Cooked kababs stay good in an airtight container in the fridge for three days. Reheat in a hot pan or air fryer so the outside crisps up again. The microwave softens them, so I avoid it when possible.
You can freeze the shaped uncooked kababs. Place them on a tray until solid, then transfer to a freezer bag. Cook from frozen, adding a few extra minutes to the time. They taste almost as good as fresh.
Common Mistakes and How I Fixed Them
Early on I did not squeeze the vegetables enough. The mixture stayed wet and the kababs fell apart in the pan. Now I squeeze until my hands hurt. That solved it.
I once used too much chickpea flour. The kababs became dense and pasty. Stick to the measured amount and adjust only if the mixture truly needs it.
Cooking on high heat was another early error. The outside burned while the center stayed raw. Medium heat and a little patience fixed that completely.
Skipping the resting time also caused problems. The kababs were too soft and lost their shape. Twenty minutes in the fridge makes a noticeable difference.
Why I Keep Coming Back to This Recipe
There is something deeply satisfying about making kababs from scratch. The process is simple enough for a busy evening yet special enough for company. The contrast of textures never gets old. Every time I take the first bite, the crisp outside gives way to the soft, spiced inside, and I remember why I love this dish so much.
I have shared this kabab recipe veg with friends who were new to Indian-inspired cooking. They all reported success on the first try. That is the best feedback I can get. When a recipe works for beginners and still impresses experienced cooks, it earns a permanent spot in the rotation.
The ingredients are flexible. Use whatever vegetables you have. The method stays the same. That flexibility keeps it practical for real life. Some nights I have only potatoes, carrot, and onion. Other nights I add whatever is left in the crisper. The result always tastes good.

FAQ About This Kabab Recipe Veg
Can I make this kabab recipe veg without potatoes?
Yes. Replace the potatoes with an equal amount of cooked and mashed sweet potato or cauliflower rice that has been squeezed very dry. The binding will be slightly different, so you may need a little extra chickpea flour.
How do I keep the kababs from falling apart?
Squeeze the grated vegetables thoroughly, use enough binding ingredients, and chill the shaped kababs before cooking. Those three steps almost guarantee they hold together.
Is this recipe spicy?
It has a mild to medium heat level as written. You can leave out the green chili and reduce the red chili powder for a milder version that still has plenty of flavor from the other spices.
Can I bake these instead of frying?
Absolutely. Baking at 400°F with a light oil brush produces excellent results. They will be slightly less crisp than pan-fried but still very good and lighter.
How long do leftover kababs last?
Cooked kababs keep in the refrigerator for up to three days. Reheat in a skillet or air fryer to restore the crisp texture.
What can I use instead of chickpea flour?
All-purpose flour works in a pinch, though the flavor changes slightly. Cornstarch mixed with a little rice flour also helps bind the mixture.
Can I prepare the mixture ahead of time?
Yes. Mix everything, cover, and refrigerate for up to twenty-four hours. Shape and cook when you are ready to eat.
Are these kababs freezer-friendly?
The shaped uncooked kababs freeze well for up to a month. Cook them straight from the freezer, adding a few extra minutes to the cooking time.
What sides go best with this dish?
Yogurt dip, mint chutney, sliced onions, lemon wedges, and warm flatbread make a classic combination. A simple green salad also works well for a lighter meal.
Can I make these gluten-free?
Yes. Use chickpea flour only and coat with crushed gluten-free crackers or rice cereal instead of regular breadcrumbs.
I have made this Easy Veg Kabab Recipe That’s Crispy Outside, Soft Inside on quiet weeknights and for weekend gatherings. It always earns compliments. The process feels rewarding without being complicated. Once you try it, I believe you will keep the recipe close at hand. The combination of everyday ingredients, clear steps, and that perfect texture contrast makes it a true winner. Enjoy every crispy, soft, flavorful bite.