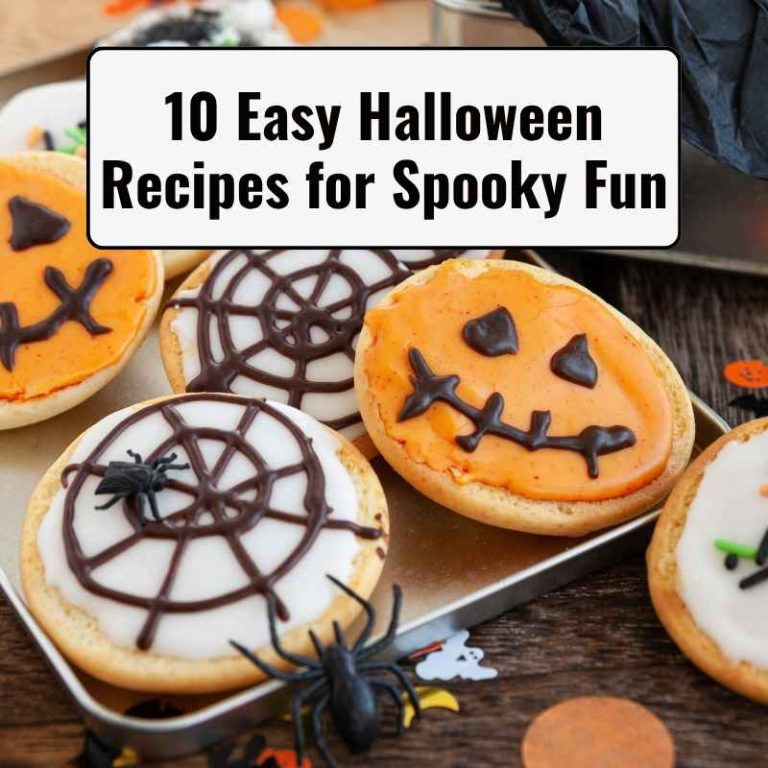
30 Spooky Halloween Recipes for Kids to Make
Halloween recipes for kids are a fantastic way to get them involved in the holiday spirit and create some delicious, themed treats. From creepy crawly cupcakes to monstrously fun snacks, these recipes offer something for every little ghoul and goblin. Making these together not only results in tasty goodies but also creates lasting memories.
Let’s explore some spooktacular ideas that are sure to be a hit with children of all ages.
Simply put, these Halloween recipes for kids offer a fun, hands-on way to celebrate the season with creative, edible projects. They range from simple assembly to slightly more involved baking, ensuring variety and engagement for young chefs.
Key Takeaways
- Halloween recipes for kids can be tailored to various skill levels, from no-bake treats to simple baking projects.
- Utilizing candy, food coloring, and simple decorations can transform ordinary snacks into spooky creations.
- Many Halloween recipes for kids focus on easy assembly, allowing children to participate actively in decorating.
- These recipes provide a fun, educational activity that enhances creativity and fine motor skills.
- Preparing Halloween recipes for kids fosters family bonding and holiday excitement.
Easy Spooky Spiderweb Brownies
These spiderweb brownies are a classic for a reason – they’re simple to make and incredibly effective at looking festive. Start with your favorite brownie recipe or a store-bought mix. The magic happens with the simple frosting decoration that kids will love to create.
The key to this recipe is the contrast between the dark brownie and the white frosting. It’s a visually striking dessert that tastes just as good as it looks. Children can help spread the frosting and then draw the webs, making it a fully engaging activity.
- Prepare your favorite brownie batter and bake according to instructions.
- Let the brownies cool completely before frosting.
- Prepare a simple white buttercream frosting or use store-bought vanilla frosting.
- Spread a generous, even layer of white frosting over the cooled brownies.
- Fit a piping bag with a small round tip (or use a zip-top bag with a corner snipped off).
- Fill the bag with melted chocolate or a darker frosting.
- Pipe concentric circles of chocolate onto the white frosting, starting from the center.
- Use a toothpick or skewer to drag lines from the center outwards through the chocolate circles to create the spiderweb effect.
- Repeat across the entire surface of the brownies.
Tip: For younger children, you can pre-draw the web lines with a marker on parchment paper and have them pipe the frosting directly into the lines.
Pros and Cons
| Pros | Cons |
|---|---|
| Very easy to decorate and involves minimal fuss. | Requires cooling time for brownies, which can test patience. |
| Visually impressive with simple techniques. | Frosting consistency is key for best web results. |
| Kids of all ages can participate in the decorating. | Can get messy, so prepare for clean-up. |
These brownies are best for anyone who loves chocolate and a simple, yet effective, Halloween decoration.
Mummy Hot Dogs
Mummy hot dogs are a fun and savory treat that kids absolutely adore. They’re incredibly easy to assemble and look hilariously spooky on any Halloween platter. This recipe transforms ordinary hot dogs into edible mummies using simple ingredients.
The key is using puff pastry or crescent roll dough to create the mummy bandages. Baking them until golden brown gives them a delightful crispiness. Adding a couple of small dots of mustard or ketchup for the eyes at the end truly brings these mummies to life.
- 1 package of hot dogs (cocktail or full-sized)
- 1 package of puff pastry or crescent roll dough
- 1 egg, beaten (for egg wash)
- Mustard or ketchup for eyes
- Preheat your oven to 375°F (190°C). Line a baking sheet with parchment paper.
- If using puff pastry, thaw it according to package directions. Unroll the dough.
- Cut the dough into thin strips, about 1/4 to 1/2 inch wide.
- Take each hot dog and wrap it with the dough strips, leaving a small gap at the top for the “face.” Overlap the strips slightly to create a mummy-like effect.
- Place the wrapped hot dogs on the prepared baking sheet.
- Brush the dough with the beaten egg for a golden finish.
- Bake for 15-20 minutes, or until the pastry is puffed and golden brown.
- Once cooled slightly, use small dots of mustard or ketchup to create the mummy’s eyes.
Warning: Be careful when cutting the dough strips; thinner strips are easier to wrap and cook more evenly.
Pros and Cons
| Pros | Cons |
|---|---|
| Kid-friendly and a fun savory option for parties. | Requires some assembly time for wrapping each hot dog. |
| Uses common, accessible ingredients. | Can be a bit greasy depending on the hot dog used. |
| Quick to bake once assembled. | Eye placement might be tricky for very young children. |
Mummy hot dogs are best served warm and are a hit as appetizers or a fun main course for Halloween parties.
Ghostly Banana & Mandarin Orange Pops
For a healthier, no-bake Halloween treat, these ghost pops are an absolute winner. They require minimal effort and are perfect for little ones to help assemble. Using simple fruits and a touch of chocolate, you can create a parade of adorable ghosts.
The combination of sweet banana and juicy mandarin orange creates a refreshing taste. They are naturally spooky and fun, making them a great alternative to sugary confections. Plus, they’re incredibly easy to transport for school parties or trick-or-treat events.
- 1-2 ripe bananas, sliced into 1-inch thick pieces
- 1 can (15 oz) mandarin oranges, drained and patted dry
- Mini chocolate chips (for eyes)
- Popsicle sticks or skewers
- If using popsicle sticks, insert one into each banana slice. If using skewers, you can insert them later.
- For each ghost, take a mandarin orange segment and place it on top of the banana slice, cut-side down, to form the ghost’s body. The banana will act as the ghost’s head.
- Gently press two mini chocolate chips into the banana slice to create the ghost’s eyes.
- If using skewers, insert them into the bottom of the banana slice now.
- Place the ghost pops on a tray lined with parchment paper and refrigerate for at least 30 minutes to firm up.
- Serve chilled.
Tip: Ensure the mandarin orange segments are thoroughly dried. This helps the chocolate chips adhere better and prevents the fruit from sliding off.
Pros and Cons
| Pros | Cons |
|---|---|
| Extremely healthy and requires no baking. | Can melt quickly if left out at room temperature. |
| Perfect for young children to assemble independently. | Requires refrigeration before serving. |
| Uses natural sweetness from fruits. | Chocolate chips might be tricky for very young hands to place. |
These ghost pops are best for a quick, healthy snack option, especially for younger children or those with dietary restrictions.
Monster Rice Krispie Treats
Transform the beloved classic Rice Krispie treat into a Halloween monster masterpiece. These are incredibly versatile, allowing for endless creativity with colors and decorations. Kids can go wild adding candy eyes, sprinkles, and even fondant for fangs and hair.
The beauty of this recipe lies in its simplicity. It’s a no-bake treat that’s quick to prepare and always a crowd-pleaser. Adding a touch of food coloring to the melted marshmallows gives the treats a vibrant, monstrous hue.
- 6 cups Rice Krispies cereal
- 1 bag (10 oz) marshmallows
- 3 tablespoons butter
- Green, purple, or orange food coloring (optional)
- Assorted candy eyes, sprinkles, mini M&Ms, edible glitter, fondant for decorations
- Grease a 9×13 inch pan with butter or cooking spray.
- In a large saucepan, melt the butter over low heat.
- Add the marshmallows and stir constantly until completely melted and smooth.
- If using food coloring, stir in a few drops until you achieve the desired monster color.
- Remove from heat and add the Rice Krispies cereal. Stir until well coated.
- Press the mixture evenly into the prepared pan. Use a greased spatula or wax paper to press firmly.
- While the treats are still warm and slightly sticky, press your chosen decorations (candy eyes, sprinkles, etc.) onto the surface to create monster faces.
- Let cool completely, then cut into squares or fun monster shapes.
Important: Work quickly once the cereal is added to the marshmallows, as the mixture sets fast. Have all your decorations ready beforehand.
Pros and Cons
| Pros | Cons |
|---|---|
| Highly customizable with various decorations. | Can be sticky and messy to make. |
| No-bake and relatively quick to prepare. | Marshmallow mixture can be very hot; adult supervision is essential. |
| A favorite treat for children of all ages. | Decorating can become the main activity, potentially extending prep time. |
Monster Rice Krispie treats are best for parties where kids can actively participate in decorating their own monstrous creations.
Witch Finger Pretzels
These witch finger pretzels are a fantastically spooky and easy-to-make treat. They combine the salty crunch of pretzels with sweet, green candy melts, making them irresistible. The addition of a sliced almond at the tip perfectly mimics a witch’s nail.
This recipe is particularly great for younger children as it involves simple dipping and placing. It’s a fun way to engage them in creating something that looks both creepy and delicious. They’re perfect for Halloween goodie bags or as a festive snack.
- Pretzel rods
- Green candy melts
- Sliced almonds
- Optional: Red or black edible food pen for knuckles or details
- Melt the green candy melts according to package directions. This can be done in a microwave-safe bowl in 30-second intervals, stirring between each, or in a double boiler.
- Dip each pretzel rod into the melted candy melts, coating about two-thirds of the rod. Let excess drip off.
- While the candy melt coating is still wet, gently press a sliced almond onto the tip of the pretzel to resemble a fingernail.
- Place the coated pretzels on parchment paper to set.
- If desired, use a red or black edible food pen to draw lines on the pretzel to mimic knuckles for an extra spooky effect.
- Allow the candy melts to harden completely before serving or packaging.
Tip: For a more textured look, you can slightly smudge the candy melt coating before adding the almond, making it look more gnarled.
Pros and Cons
| Pros | Cons |
|---|---|
| Simple dipping and decorating process. | Candy melts can be tricky to work with if they overheat or cool too quickly. |
| Combines sweet and salty flavors. | Almonds can be a choking hazard for very young children. |
| Looks impressively spooky with minimal effort. | Can be a bit messy if not careful with the melted candy. |
Witch finger pretzels are best for kids who enjoy a sweet and salty snack with a creepy Halloween theme.
Graveyard Pudding Cups
These graveyard pudding cups are a wonderfully eerie dessert that kids can help assemble. Layering chocolate pudding with crushed cookies and adding spooky elements creates a mini graveyard in a cup. It’s a fun, edible craft that’s always a hit at parties.
The base of crushed chocolate cookies provides the perfect “dirt” for your graveyard. Gummy worms peeking out add a creepy-crawly effect, and a cookie tombstone makes the scene complete. This is a fantastic way to introduce some delicious darkness to your Halloween spread.
- Chocolate pudding cups (store-bought or homemade)
- Chocolate sandwich cookies (like Oreos), crushed
- Gummy worms
- Milano cookies or graham crackers (for tombstones)
- Optional: Halloween-themed sprinkles, edible markers
- Prepare the chocolate pudding cups. If making your own, spoon them into individual clear cups or bowls.
- Crush the chocolate sandwich cookies in a zip-top bag with a rolling pin or in a food processor until they resemble dirt.
- Spoon a generous layer of crushed cookies over the top of the pudding in each cup.
- Stick a few gummy worms into the “dirt,” letting them peek out as if they’re crawling.
- Write “RIP” or a spooky message on the Milano cookies or graham crackers using an edible marker to create tombstones. You can also use a knife to carve a simple shape if desired.
- Stick one “tombstone” cookie into the crushed cookie layer of each pudding cup.
- Add any optional Halloween sprinkles for extra flair.
- Refrigerate until ready to serve.
Important: Use clear cups so the layers are visible and the graveyard effect is enhanced.
Pros and Cons
| Pros | Cons |
|---|---|
| Easy for kids to assemble with minimal mess. | Requires clear cups for the best visual appeal. |
| Combines creamy pudding with crunchy cookie bits. | Gummy worms might be tricky for very young children to handle. |
| Can be prepared in advance. | Milano cookies can be delicate and break easily. |
Graveyard pudding cups are best for a fun, individual dessert that kids can personalize and enjoy at parties or as a Halloween treat.
Spooky Donut Hole “Eyeballs”
These donut hole “eyeballs” are a simple yet striking Halloween treat. They’re perfect for parties or a quick festive snack. By using white icing as a base and adding a few key elements, you can turn ordinary donut holes into creepy, staring eyeballs.
The effectiveness of these treats comes from their visual simplicity. A white icing base represents the eyeball’s sclera, while colorful candy creates the iris, and a chocolate chip or candy melts forms the pupil. Adding red candy melts for veins really amplifies the spookiness.
- Donut holes (plain or glazed work best)
- White candy melts or white royal icing
- Red candy melts (for veins)
- Round candies or fruit snacks for the iris (e.g., M&Ms, Skittles, fruit slices)
- Mini chocolate chips or black candy melts for the pupil
- Toothpicks or skewers
- If using white candy melts, melt them according to package directions. If using royal icing, prepare it to a piping consistency.
- Dip each donut hole into the white coating, ensuring it’s fully covered. Let excess drip off.
- Place the coated donut hole on parchment paper.
- While the white coating is still wet, gently press a round candy or fruit snack onto the center to create the iris.
- Place a mini chocolate chip or a small dot of black candy melt in the center of the iris for the pupil.
- If using red candy melts, melt them and use a toothpick to draw thin veins radiating from the iris across the white coating.
- Let the eyeballs set completely before serving.
Warning: Ensure the white candy melt coating is set enough to support the iris and pupil without them sliding, but not completely hardened, so they adhere well.
Pros and Cons
| Pros | Cons |
|---|---|
| Quick and easy to assemble with minimal ingredients. | Can be a bit messy to dip the donut holes. |
| Highly effective spooky appearance. | Requires some precision for placing the iris and pupil. |
| Appeals to both kids and adults. | Might require multiple attempts to perfect the look. |
These spooky donut hole eyeballs are best served as a fun, bite-sized treat at parties or as a quick Halloween snack.
Edible “Monster” Slime Dip
This edible “monster” slime dip is a playful and delicious party snack that kids will love to “dig” into. It’s a creamy, often green-hued dip that’s served with dippers, making it a fun and interactive treat. The key is the vibrant color and imaginative presentation.
The dip itself can be made from various ingredients, such as cream cheese, avocado, or even a sweet dessert dip. The “slime” aspect comes from its texture and vibrant color, often achieved with green food coloring. Serving it in a fun bowl with spooky dippers completes the monster look.
- For a savory dip (e.g., cream cheese based):
- 8 oz cream cheese, softened
- 1/4 cup sour cream
- 1/4 cup mayonnaise
- 1-2 drops green food coloring
- Salt and pepper to taste
- Optional: finely chopped chives or spinach for natural color
- For a sweet dip (e.g., dessert dip):
- 1 package (8 oz) cream cheese, softened
- 1 cup marshmallow creme
- 1/2 cup sour cream
- Green food coloring
- Assorted dippers: pretzel sticks, pita chips, vegetable sticks (carrots, celery), crackers
- For Savory Dip: In a medium bowl, combine softened cream cheese, sour cream, and mayonnaise. Mix until smooth and well combined.
- Add 1-2 drops of green food coloring and stir until evenly distributed. Add more if a deeper green is desired. If using, stir in finely chopped chives or pureed spinach for a more natural green.
- Season with salt and pepper to taste.
- For Sweet Dip: In a medium bowl, beat softened cream cheese until smooth.
- Stir in marshmallow creme and sour cream until well combined and fluffy.
- Add green food coloring gradually until the desired slime color is achieved.
- Arrange the dippers around the bowl of dip to resemble a monster’s mouth or create a spooky scene.
- Serve immediately or chill for later.
Tip: For an extra spooky touch, you can use edible googly eyes placed around the rim of the bowl or on top of the dip.
Pros and Cons
| Pros | Cons |
|---|---|
| Highly versatile, can be made sweet or savory. | Relies heavily on food coloring for appearance. |
| Interactive and fun for kids to dip. | Texture can be polarizing for some individuals. |
| Easy to prepare with common ingredients. | May require more effort to achieve a truly smooth “slime” texture. |
This monster slime dip is best for parties where a communal, interactive snack is desired, appealing to children who enjoy sensory play.
Pumpkin Patch Brownies
These pumpkin patch brownies are a delightful way to bring the essence of Halloween into your kitchen. They start with a rich, fudgy brownie base and are transformed into adorable mini pumpkins with simple frosting and decorations. Kids will have a blast helping to create these festive treats.
The beauty of this recipe lies in its simplicity and visual appeal. By frosting squares of brownies in orange and adding a green stem, you instantly create recognizable pumpkins. Drawing on jack-o’-lantern faces with edible markers or a darker frosting adds the perfect spooky touch.
- Fudgy brownie recipe or mix
- Orange frosting (store-bought or homemade buttercream)
- Green frosting or green candy melts
- Edible black marker or black frosting
- Optional: Candy pumpkins or candy corn for decoration
- Bake your favorite fudgy brownies in a 9×13 inch pan according to recipe instructions.
- Let the brownies cool completely.
- Cut the brownies into uniform squares.
- Generously frost each brownie square with orange frosting, making sure to cover the top and sides for a complete pumpkin look.
- Use a small amount of green frosting or melted green candy to create a stem on the top of each frosted brownie.
- Once the orange frosting is slightly set, use an edible black marker or black frosting to draw jack-o’-lantern faces (eyes, nose, mouth) onto each pumpkin brownie.
- Add any optional decorations like candy pumpkins or candy corn around the edges if desired.
- Allow frosting to set before serving.
Important: Ensure the brownies are completely cool before frosting to prevent the frosting from melting.
Pros and Cons
| Pros | Cons |
|---|---|
| Combines a delicious brownie base with festive decoration. | Requires some patience for cutting and frosting each piece. |
| Kids can easily help with frosting and drawing faces. | Drawing faces might be challenging for very young children. |
| Visually appealing and festive for Halloween. | Requires multiple colors of frosting or candy. |
These pumpkin patch brownies are best for a delightful Halloween treat that doubles as a fun activity for kids and adults alike.
Pretzel Stick “Broomsticks”
These pretzel stick “broomsticks” are a simple, charming, and delicious Halloween treat. They’re incredibly easy to make, require no baking, and are perfect for little hands to help assemble. Their whimsical design makes them a fun addition to any Halloween party spread.
The combination of a salty pretzel stick with a sweet, chewy “broom” at the end offers a delightful flavor contrast. They can be customized with different candies or drizzles, making each broomstick unique. These are also great for goodie bags or as a cute snack for a Halloween movie night.
- Pretzel sticks
- Caramel squares or soft taffy, unwrapped
- Optional: Chocolate chips, sprinkles, edible glitter for drizzling
- Melt the caramel squares or taffy in a microwave-safe bowl in 30-second intervals, stirring between each, until smooth and pliable. Be careful not to overheat.
- Take a pretzel stick and dip one end into the melted caramel or taffy, swirling to coat about 1-2 inches of the pretzel.
- You can also use your fingers (lightly greased) to mold and shape the caramel into broom bristles around the end of the pretzel.
- If using, drizzle with melted chocolate or sprinkle with edible glitter while the caramel is still soft.
- Place the finished broomsticks on parchment paper to set completely.
- Once hardened, they are ready to be served or packaged.
Tip: For a different look, you can also use melted white chocolate or candy melts tinted with brown food coloring for the broom bristles.
Pros and Cons
| Pros | Cons |
|---|---|
| Extremely easy to make and requires no baking. | Can be sticky to handle during the assembly process. |
| Combines salty pretzel with sweet caramel. | Caramel can harden too much if overheated, making it difficult to work with. |
| Great for individual servings and party favors. | Requires careful melting of caramel to avoid burning. |
Pretzel stick broomsticks are best as a quick, festive snack for kids who enjoy a sweet and salty combination.
Candy Corn Fruit Parfaits
These candy corn fruit parfaits are a visually stunning and healthier alternative to traditional Halloween candy. By layering yellow, orange, and white ingredients in clear glasses, you can mimic the iconic candy corn stripes. They are delightful, refreshing, and incredibly easy to assemble, making them a perfect activity for kids.
The charm of this recipe lies in its vibrant, layered appearance. Each layer represents a color of candy corn, using fruits and dairy that are both delicious and nutritious. They make for an impressive dessert that’s both festive and satisfying.
- For the Yellow Layer: Pineapple chunks (fresh or canned, drained) or yellow cake crumbs
- For the Orange Layer: Mandarin orange segments (drained) or apricot halves
- For the White Layer: Whipped cream, vanilla yogurt, or coconut cream
- Clear glasses or jars
- Optional: Candy corn candies for garnish
- Start by preparing your layers. Ensure all fruits are well-drained to prevent the parfaits from becoming watery.
- Begin layering the ingredients in clear glasses, starting with the yellow layer at the bottom. Pack it down gently.
- Add the orange layer next, creating a distinct stripe.
- Top with the white layer, such as whipped cream or yogurt, smoothing it out to create a clean line.
- Repeat the layers if your glasses are tall enough and you have enough ingredients.
- Garnish the top with a few candy corn candies or a dollop of extra whipped cream.
- Refrigerate the parfaits for at least 30 minutes before serving to allow the flavors to meld and the layers to set slightly.
Important: Using clear glasses is key to showcasing the candy corn effect. Ensure your layers are relatively even and distinct for the best visual result.
Pros and Cons
| Pros | Cons |
|---|---|
| Visually striking and festive without being overly processed. | Requires careful layering to maintain distinct colors. |
| Can be adapted with different fruits for color variations. | If not drained properly, parfaits can become watery. |
| Easy for kids to help with assembly. | May require specific fruits to achieve the exact candy corn colors. |
Candy corn fruit parfaits are best for a lighter, refreshing dessert that looks festive and appeals to those seeking healthier Halloween options.
Spooky Jell-O Worms
These spooky Jell-O worms are a classic creepy treat that’s fun for kids to make and eat. By suspending gummy worms in brightly colored Jell-O, you create a jiggly, wiggly dessert that looks like something crawled out of the earth. It’s a simple yet effective way to bring a touch of the macabre to your Halloween table.
The magic of this recipe is its simplicity and the surprise element of the worms. The texture of the Jell-O combined with the chewiness of the gummy worms is a delightful contrast. You can choose any Jell-O flavor and color to match your Halloween theme.
- 1-2 boxes of Jell-O (any flavor/color, e.g., lime green, cherry red)
- Gummy worms
- Water (as per Jell-O package instructions)
- Clear cups or individual serving dishes
- Prepare the Jell-O according to package directions. Use boiling water to dissolve the Jell-O powder, then stir in cold water.
- Let the prepared Jell-O cool slightly at room temperature for about 10-15 minutes. This prevents the gummy worms from floating to the top too much and allows them to partially set without fully hardening.
- Place a few gummy worms into each clear cup or serving dish. You can arrange them to look like they are crawling or stuck.
- Carefully pour the slightly cooled Jell-O mixture over the gummy worms, ensuring they are mostly submerged.
- Refrigerate the Jell-O for at least 4 hours, or until firm.
- Serve chilled and watch the kids marvel at the spooky worms!
Warning: Do not pour hot Jell-O directly onto the gummy worms, as it can cause them to partially dissolve or lose their shape.
Pros and Cons
| Pros | Cons |
|---|---|
| Simple preparation with minimal ingredients. | Requires significant chilling time. |
| Visually appealing and fun for Halloween. | Gummy worms can sometimes float to the top or sink completely. |
| A refreshing and light dessert option. | The texture might not appeal to everyone. |
Spooky Jell-O worms are best served chilled as a fun, jiggly dessert for Halloween parties and gatherings.
“Ghost” Meringue Cookies
These ghostly meringue cookies are a light, airy, and delightfully sweet treat perfect for Halloween. Made from whipped egg whites and sugar, they bake up to be crisp on the outside and chewy on the inside. Kids can help pipe the ghost shapes and draw on the faces, making it a fun decorating activity.
The simple ingredients and delicate texture of meringues make them a unique Halloween confection. They’re naturally white, making them ideal for creating ghost shapes. A few dots of edible marker transform them into charming, spooky specters.
- 3 large egg whites, room temperature
- 3/4 cup granulated sugar
- 1/4 teaspoon cream of tartar
- 1/2 teaspoon vanilla extract
- Black edible marker
- Preheat oven to 200°F (95°C). Line baking sheets with parchment paper.
- In a clean, dry bowl, beat egg whites with an electric mixer on medium speed until foamy.
- Add cream of tartar and continue beating until soft peaks form.
- Gradually add granulated sugar, one tablespoon at a time, beating well after each addition until stiff, glossy peaks form. Beat in vanilla extract.
- Spoon the meringue mixture into a piping bag fitted with a round tip (or use two spoons).
- Pipe ghost shapes onto the prepared baking sheets. You can make them tall and thin or rounder.
- Bake for 60-90 minutes, or until meringues are dry to the touch and lift easily off the parchment paper. Turn off the oven and let them cool completely inside the oven with the door slightly ajar.
- Once cooled, use the black edible marker to draw two small eyes and a mouth on each ghost.
Important: Ensure your bowl and beaters are completely free of grease, as even a small amount can prevent the egg whites from whipping properly.
Pros and Cons
| Pros | Cons |
|---|---|
| Light, airy, and melt-in-your-mouth texture. | Requires a low oven temperature and long baking time. |
| Naturally white, perfect for ghost designs. | Can absorb moisture from the air, becoming sticky if not stored properly. |
| Simple ingredients and customizable shapes. | Drawing faces requires a steady hand or edible markers. |
Ghost meringue cookies are best for a delicate, sweet treat that’s visually charming and appealing to those who prefer lighter desserts.
Mini Witch Hats
These mini witch hats are an adorable and easy-to-make Halloween treat. They combine a cookie base, a chocolate kiss, and a round candy to create a perfectly formed miniature witch hat. They are perfect for little hands to help assemble and look incredibly charming on any party table.
The simplicity of this recipe is its strength. Using store-bought cookies and candies makes it a quick assembly project. The combination of chocolate and cookie creates a delightful bite-sized treat that’s both festive and delicious.
- Chocolate sandwich cookies (e.g., Oreos)
- Hershey’s Kisses (chocolate)
- Round candies (e.g., mini Reese’s Cups, chocolate wafers)
- Optional: Green or purple frosting for decoration
- Prepare your workspace by laying out parchment paper.
- Take one chocolate sandwich cookie.
- Spread a small amount of frosting (if using) or a dab of melted chocolate on the flat side of a Hershey’s Kiss.
- Press the Kiss onto the center of the cookie to form the pointed part of the hat.
- Spread frosting or melted chocolate on the flat side of the round candy (e.g., mini Reese’s Cup).
- Place this round candy on top of the Kiss to create the brim of the hat.
- If desired, add decorative frosting swirls or edible glitter to the brim or hat.
- Let the hats set completely before serving.
Tip: For an extra festive touch, consider using colored candy melts to create the hat brim or to add decorative details.
Pros and Cons
| Pros | Cons |
|---|---|
| Extremely easy and quick to assemble. | Can be a bit messy if using frosting or melted chocolate. |
| Uses readily available ingredients. | The Kiss might stick to fingers if not handled carefully. |
| Charming and festive appearance. | Best results achieved with fresh candies and cookies. |
Mini witch hats are best for a quick, no-bake treat that kids can easily help make and enjoy as a bite-sized Halloween delight.
Caramel Apple Slices
Caramel apple slices are a delightful and less messy alternative to whole caramel apples, making them perfect for kids. These treats offer all the classic caramel apple flavor in an easy-to-handle format. They’re a fantastic way to enjoy the crispness of apples paired with sweet, gooey caramel.
The appeal of this recipe lies in its simplicity and the ability to customize. You can let kids help dip the apple slices or decorate them with sprinkles and drizzles. They are festive, delicious, and always a hit during the autumn season.
- Firm apples (like Gala, Fuji, or Honeycrisp)
- Caramel bits or squares, melted
- Optional toppings: chopped nuts, mini chocolate chips, sprinkles, crushed cookies, a drizzle of melted chocolate
- Parchment paper
- Wooden popsicle sticks or skewers
- Wash and dry the apples thoroughly.
- Cut the apples into thick slices or wedges, removing the core. You can use a knife or an apple corer/slicer.
- Melt the caramel bits or squares according to package directions. This usually involves a microwave in 30-second intervals, stirring between each.
- Dip each apple slice into the melted caramel, ensuring it’s well coated on one side.
- Let the excess caramel drip off.
- Place the caramel-coated apple slices onto a parchment paper-lined baking sheet.
- While the caramel is still soft, sprinkle with your desired toppings or drizzle with melted chocolate.
- Insert a popsicle stick or skewer into the un-coated end of each slice for easy handling, if desired.
- Allow the caramel to set completely in the refrigerator before serving.
Important: Use apples that are firm and have less moisture to prevent the caramel from sliding off. Patting them dry is crucial.
Pros and Cons
| Pros | Cons |
|---|---|
| Easier to eat than whole caramel apples. | Apples can brown quickly if not dipped in caramel immediately after slicing. |
| Customizable with various toppings. | Melting caramel requires careful attention to avoid burning. |
| Delicious combination of crisp apple and chewy caramel. | Can be messy to prepare. |
Caramel apple slices are best for a festive fall treat that kids can help make and enjoy, offering a delicious balance of fruit and candy.
Monster Mouth Cookies
These monster mouth cookies are a fun and slightly mischievous treat that kids will adore. They start with a simple cookie base, often gingerbread or sugar cookie, cut into a mouth shape. The real magic comes in decorating them with marshmallow teeth, red icing “gums,” and candy eyes.
The appeal of this recipe is its playful, slightly spooky nature. Kids can actively participate in creating the monster’s expression by choosing the teeth and eye placement. It’s a creative dessert that sparks imagination and satisfies a sweet craving.
- Your favorite sugar cookie or gingerbread cookie dough
- Red frosting or icing
- Mini marshmallows or white candy melts (cut into teeth shapes)
- Candy eyeballs or small candies for eyes
- Optional: Green or purple frosting for accents
- Prepare your cookie dough and chill if necessary.
- Roll out the dough to about 1/4 inch thickness.
- Using a knife or cookie cutters, cut out mouth shapes from the dough. You can create a simple open mouth or a more jagged, monstrous grin.
- Place the cut cookies onto a baking sheet lined with parchment paper.
- Bake according to your cookie recipe’s instructions until golden brown. Let them cool completely on a wire rack.
- Once cooled, frost the inside of the “mouth” with red frosting to represent gums.
- Arrange mini marshmallows or cut white candy melts along the edge of the red frosting to create teeth.
- Place candy eyeballs or other small candies above the gum line to form the monster’s eyes.
- Add any optional green or purple frosting details for extra flair.
- Let the decorations set before serving.
Important: Ensure the cookies are completely cool before decorating to prevent the frosting and candies from melting or sliding off.
Pros and Cons
| Pros | Cons |
|---|---|
| Highly customizable with different monster expressions. | Cutting uniform mouth shapes can be challenging. |
| Fun and interactive decorating process for kids. | Requires several different components for decoration. |
| Delicious cookie base with sweet toppings. | Can be a bit time-consuming to assemble many cookies. |
Monster mouth cookies are best for a creative, edible craft that kids can enjoy making and then eating, perfect for Halloween parties or events.
Bat Bites (Chocolate & Peanut Butter Energy Balls)
These bat bites are a healthy and delicious energy ball recipe disguised as spooky Halloween treats. Made with simple, wholesome ingredients like oats, peanut butter, and cocoa, they’re naturally sweet and packed with energy. Kids will love helping to roll them and add the “bat wings” to create a playful Halloween snack.
The charm of these bat bites is their dual nature: they’re genuinely good for you and look festive for Halloween. The dark chocolate and peanut butter combination is a classic winner. Adding small chocolate bat wings transforms them into a perfect thematic treat.
- 1 cup rolled oats
- 1/2 cup peanut butter (or any nut/seed butter)
- 1/3 cup honey or maple syrup
- 1/4 cup unsweetened cocoa powder
- 1 teaspoon vanilla extract
- Optional: chocolate chips, chia seeds
- For decoration: small chocolate chips or melted chocolate for wings
- In a medium bowl, combine the rolled oats, peanut butter, honey (or maple syrup), cocoa powder, and vanilla extract.
- Mix thoroughly until all ingredients are well combined and a dough-like consistency forms. If the mixture is too dry, add a little more peanut butter or sweetener. If too wet, add a few more oats.
- You can add optional ingredients like chocolate chips or chia seeds at this stage.
- Roll the mixture into small balls, about 1 inch in diameter. This batch should make about 15-20 balls.
- For the “bat wings,” you can melt some chocolate chips and use a small spoon or piping bag to draw wing shapes
Content truncated due to length limits.