5-Minute Christmas Trash Recipe for Gifts
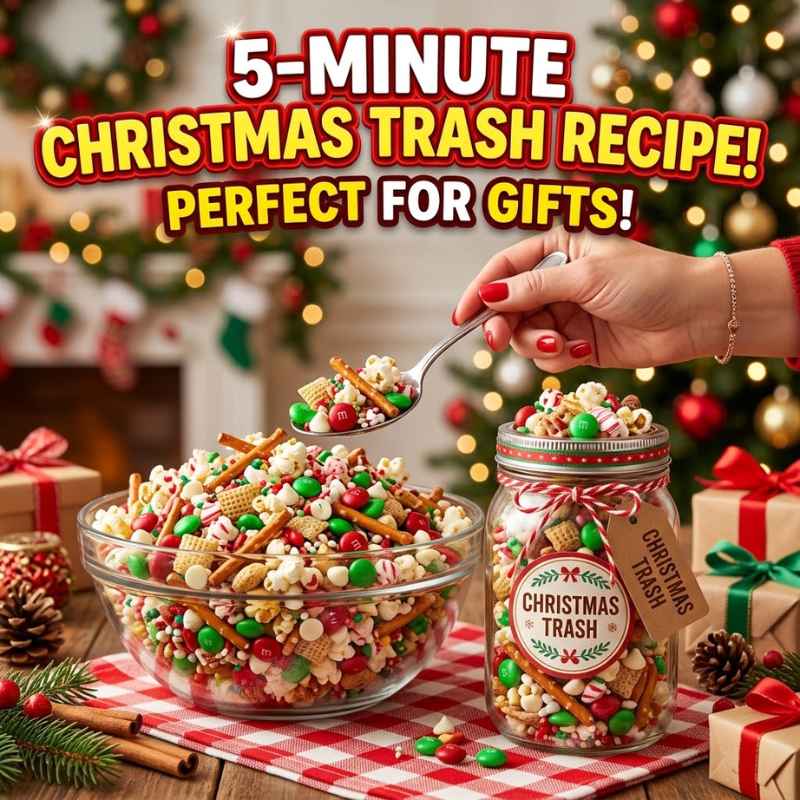
The 5-Minute Christmas Trash Recipe for Gifts is a no-bake sweet-and-salty snack mix of crunchy cereals, pretzels, peanuts, and festive M&Ms coated in smooth white chocolate. It comes together fast, sets into gift-ready clusters, and needs almost no skill—just mix, melt, and package.
Holiday gift-giving can feel overwhelming when time runs short and store-bought treats cost too much. Many home cooks want something homemade that looks special yet stays simple. Christmas Trash solves that problem. This colorful snack mix combines salty crunch with sweet white chocolate and holiday candies. It takes about five minutes of active work and uses pantry staples most people already have.
You do not need fancy tools or baking experience. Anyone can make it successfully on the first try. In the sections ahead you will find exact ingredients, clear steps, packaging ideas, smart variations, and answers to common beginner questions. Let’s create a batch that friends and family will love opening.
What Is Christmas Trash?
Christmas Trash is a playful name for a white-chocolate-coated snack mix. People also call it White Trash, Christmas Crunch, or Holiday Junk Mix. The idea started as a way to use leftover pantry items—cereals, pretzels, nuts, and candies—rather than throw them away. Coating everything in melted white chocolate turns ordinary snacks into festive clusters perfect for parties or gifts.
The mix delivers a satisfying contrast of textures: light and crispy cereal, salty pretzels, crunchy peanuts, and chewy chocolate candies. The white chocolate holds it all together and adds creamy sweetness. Red and green M&Ms plus holiday sprinkles make it look like Christmas in a bowl. Because it needs no oven, it stays beginner-friendly and keeps the kitchen cool during busy holiday days.
Why This 5-Minute Version Works So Well for Gifts
Busy parents, students, and first-time cooks often avoid homemade gifts because recipes feel complicated. This version keeps active time to roughly five minutes. You measure and mix the dry ingredients, melt the chocolate in short bursts, toss everything together, and spread it out to set. The rest of the time is hands-off while the chocolate hardens.
Homemade gifts feel more personal than store packages. A bag of Christmas Trash costs far less than gourmet snack mixes and lets you control the flavors and portion sizes. Recipients love the sweet-salty balance and the colorful look. Package it in clear bags or small tins with a simple ribbon and you have an impressive present ready in under half an hour total.
Ingredients You Will Need
Gather these simple items. Most are available at any grocery store and keep well in the pantry.
| Ingredient | Amount | Notes |
|---|---|---|
| Rice Chex or Corn Chex cereal | 5 cups | Light and crispy base |
| Mini pretzel twists | 2 cups | Adds salty crunch |
| Salted peanuts | 1 cup | Roasted and salted work best |
| Red and green M&Ms | 1–1½ cups | Holiday colors preferred |
| White chocolate chips or melting wafers | 16 oz (about 2 cups) | Chips need a little oil; wafers melt smoother |
| Coconut oil or vegetable shortening | 2 tablespoons | Helps chocolate melt smoothly |
| Holiday sprinkles | ⅓ cup | Red, green, and white for color |
Optional extras include Honey Nut Cheerios, mini marshmallows, or dried cranberries if you want more variety. Stick to the basic list the first time so you learn the texture and coating process.
Equipment Checklist
- Large mixing bowl
- Microwave-safe bowl
- Spatula or wooden spoon
- Baking sheet lined with parchment or wax paper
- Measuring cups
No special gadgets are required. A microwave makes melting fastest, but a double boiler on the stove works too if you prefer.
Step-by-Step Instructions for the 5-Minute Christmas Trash Recipe
Follow these clear steps in order. Work quickly once the chocolate melts so it stays fluid while you coat the mix.
- Line a large baking sheet with parchment paper or wax paper. Set it aside within easy reach.
- In a large mixing bowl, combine the Chex cereal, mini pretzels, and salted peanuts. Toss gently so everything is evenly mixed.
- Place the white chocolate chips and coconut oil in a microwave-safe bowl. Heat in 20- to 30-second bursts at 50 percent power, stirring after each burst. Stop when the chocolate is mostly melted and smooth. Residual heat will finish the job. Never add water—moisture makes chocolate seize and turn grainy. For safe melting guidance, see tips from reputable cooking sources such as those shared by the Food Network on proper chocolate handling.
- Pour the melted white chocolate over the cereal mixture. Use a large spatula to fold everything together until every piece is lightly coated. Work gently so you do not crush the cereal.
- Spread the coated mixture onto the prepared baking sheet in a single even layer. Immediately scatter the red and green M&Ms and holiday sprinkles over the top while the chocolate is still wet so they stick.
- Let the mixture sit at room temperature for 20–30 minutes, or place the tray in the refrigerator for 10–15 minutes to speed setting. Once fully firm, break into clusters of different sizes.
Total active time stays close to five minutes once ingredients are measured. The hands-off setting time is the only waiting period.
Tips for Perfect Results Every Time
White chocolate is more delicate than dark chocolate and burns easily. Always use short heating intervals and stir often. If the chocolate becomes too thick, stir in an extra teaspoon of oil. Avoid wooden spoons that might hold moisture.
Spread the mix thinly so clusters form instead of one big solid mass. Reserve a few M&Ms to press on top after spreading for brighter color. For nut-free versions, replace peanuts with extra pretzels or Cheerios. Store finished clusters in an airtight container at cool room temperature for up to two weeks. Proper food storage practices help keep treats fresh and safe; guidance from the U.S. Food and Drug Administration on dry snack storage is useful for longer keeping.
If you plan multiple gift batches, double or triple the recipe and use two baking sheets. The process stays the same and still finishes quickly.
How to Package Christmas Trash as Gifts
Presentation turns a simple snack into a thoughtful present. Here are easy packaging ideas that need almost no extra time.
- Fill clear cellophane bags with 1–2 cups of clusters. Tie with red or green ribbon and add a handwritten tag.
- Use small mason jars or decorative tins. Layer the mix and top with a festive fabric circle under the lid.
- Create mini gift boxes lined with parchment. Add a few extra sprinkles on top for sparkle.
- For neighbors or coworkers, portion into paper cones or small paper bags stamped with holiday designs.
Include a short note that lists the main ingredients so recipients with allergies know what is inside. The colorful look of the red and green candies and sprinkles makes the gift eye-catching without extra decoration.
Simple Variations to Make It Your Own
Once you master the basic recipe, try these beginner-friendly swaps. Each keeps the five-minute spirit.
| Variation | What to Change | Result |
|---|---|---|
| Extra crunch | Add 1 cup popped popcorn or Bugles | Lighter texture and more volume |
| Nut-free | Skip peanuts; add more pretzels or cereal | Safe for nut allergies |
| Peppermint twist | Stir ½ teaspoon peppermint extract into melted chocolate; top with crushed candy canes | Cool mint flavor |
| Chocolate lover | Use half white and half milk chocolate | Richer, deeper taste |
| Fruity | Add ½ cup dried cranberries or cherries | Chewy tart contrast |
Keep the white chocolate amount the same so the coating stays balanced. Taste a small piece after coating and adjust salt or sweetness next time if needed.
Common Mistakes and How to Avoid Them
Beginners sometimes face a few easy-to-fix issues. Overheating the chocolate is the most common. Short bursts and frequent stirring prevent burning. If the chocolate seizes and turns grainy, add a teaspoon of oil and stir vigorously; it often recovers.
Spreading the mix too thickly creates hard slabs instead of bite-size clusters. Aim for a single layer. Waiting too long to add the M&Ms and sprinkles means they fall off. Scatter them right after spreading while the chocolate is still wet.
Using warm or humid storage can soften the chocolate. Keep the finished mix in a cool, dry place in an airtight container. These small adjustments guarantee success even on the first try.
Why This Recipe Builds Kitchen Confidence
Many new cooks feel nervous about melting chocolate or making gifts that look professional. This recipe removes the pressure. There is no baking, no precise temperatures beyond gentle melting, and no complicated techniques. Each step is visual and forgiving. If a few pretzels break, the mix still tastes great. The finished product looks impressive because of the bright colors, not because of advanced skill.
Making a batch and packaging it for friends gives an immediate sense of accomplishment. You see the results in minutes and receive positive feedback quickly. That success encourages trying other simple recipes later. The combination of speed, low cost, and high reward makes Christmas Trash an ideal starting point for holiday cooking.
Storage and Make-Ahead Advice
Store the set clusters in an airtight container at room temperature for up to two weeks. For longer keeping, refrigerate in a sealed container for up to a month. Avoid freezing because moisture can make the cereal soggy when thawed. If giving as gifts, package only what will be eaten within a week or include a note about storage.
You can prepare the dry mix a day ahead and keep it covered. Melt the chocolate and finish the coating just before packaging so the clusters stay fresh and crisp. This flexibility fits busy schedules perfectly.
FAQ
Can I make Christmas Trash without a microwave?
Yes. Use a double boiler: place a heat-safe bowl over a pot of barely simmering water. Stir the chocolate and oil until smooth. Keep the water from touching the bowl and avoid steam so the chocolate does not seize.
How long does the mix take to set completely?
At room temperature it usually firms in 20–30 minutes. The refrigerator shortens that to 10–15 minutes. Break into clusters only after it is fully hard.
Is this recipe safe for kids to help with?
Yes. Children can measure the dry ingredients and scatter the M&Ms and sprinkles. An adult should handle the melted chocolate because it is hot. The process stays fun and educational.
What if I cannot find holiday M&Ms?
Use regular M&Ms or any colorful candy-coated chocolates. The red and green ones simply add festive color. Sprinkles alone still give a holiday look.
Can I use almond bark instead of white chocolate chips?
Absolutely. Almond bark melts smoothly and often needs no added oil. Follow the same short-burst method or package directions.
How many gifts does one batch make?
One batch yields about 10–12 cups of mix. That fills 8–12 small gift bags depending on portion size. Double the recipe for larger groups.
Does the mix stay crunchy for days?
Yes when stored airtight and cool. Humidity is the main enemy of crispness, so keep containers tightly closed.
Conclusion
The 5-Minute Christmas Trash Recipe for Gifts proves that delicious homemade presents do not require hours in the kitchen or professional skills. With a handful of everyday ingredients, a quick melt, and a simple toss, you create colorful clusters that taste like holiday joy. The sweet-salty balance and bright appearance make every bag or jar feel special.
Start with the basic recipe, package a few gifts, and watch how quickly they disappear. Then experiment with the variations that match your taste or the people you are giving to. Each batch builds confidence and spreads cheer. This year, skip the store lines and make something memorable with your own hands. Your friends and family will thank you—and you will enjoy the process just as much as the finished treat.
Make this Christmas delicious with easy and festive recipes from TastFork.