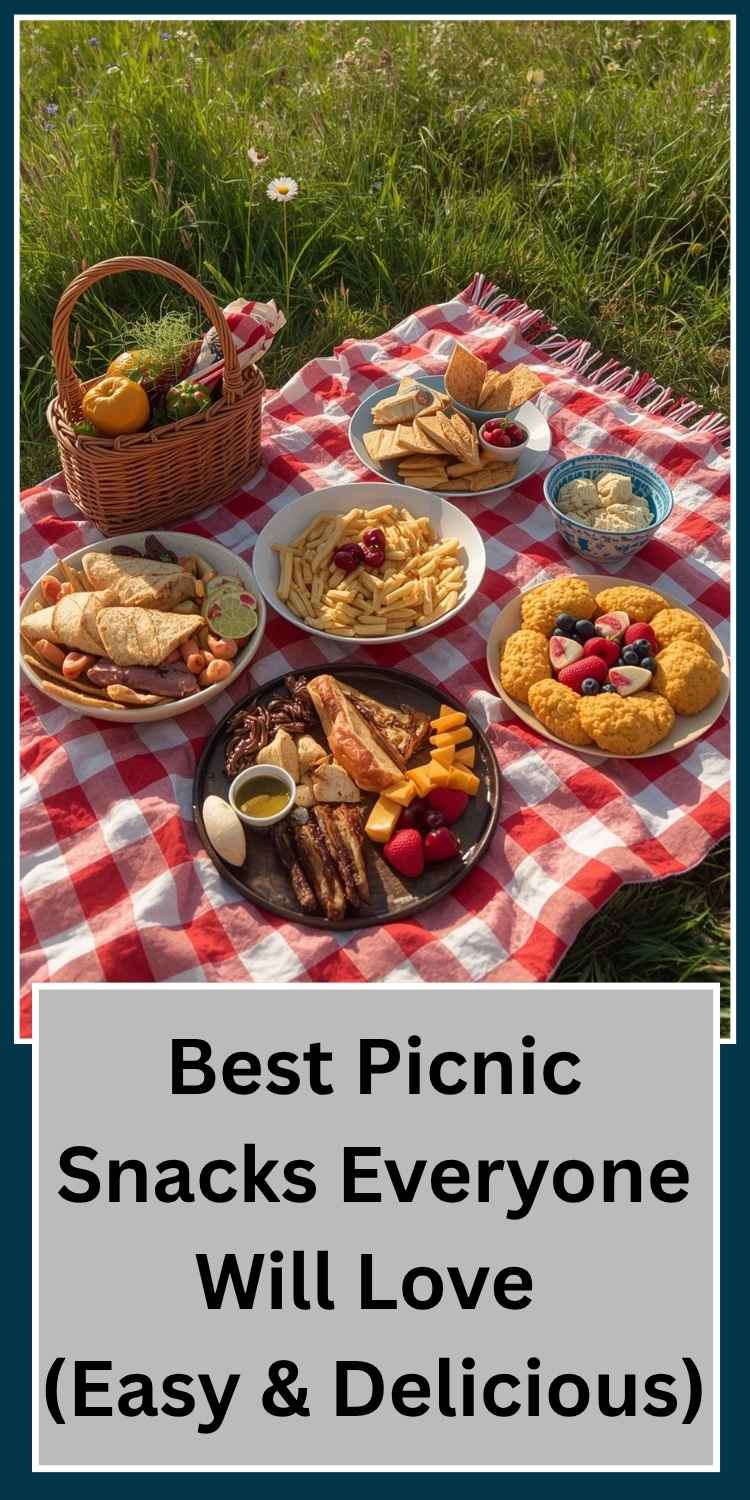
Best Picnic Snacks Everyone Will Love (Easy & Delicious)
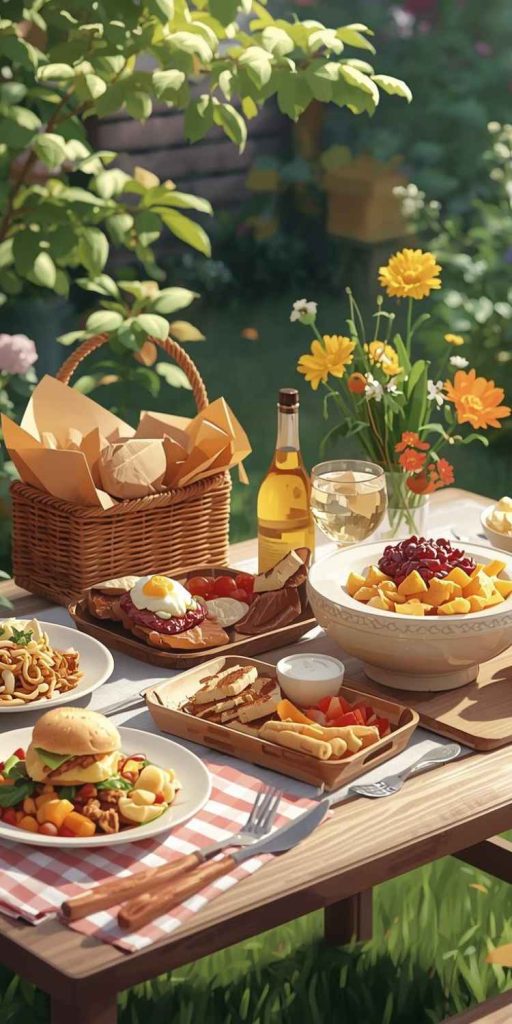
Make these simple, tasty picnic snacks at home in under 30 minutes. They travel well, please kids and adults alike, and need no fancy tools. Fresh fruits, crunchy veggies with dips, easy sandwiches, and sweet treats create a fun spread that everyone grabs and enjoys outdoors.
Picnics bring joy with good food, fresh air, and happy moments with family or friends. Yet many people worry about what to pack. Will the food stay fresh? Will kids like it? Will it taste great after travel?
You do not need chef skills or expensive ingredients. With a few basic items from your kitchen, you can create snacks that feel special and stay delicious. This guide shares easy, beginner-friendly picnic snacks that pack well, taste amazing, and make your outdoor meal memorable.
Get ready for step-by-step ideas, helpful lists, and smart tips that build your kitchen confidence. Soon you will pack a basket everyone will love.
Why Picnic Snacks Matter and How to Choose Them
Great picnic snacks do more than fill stomachs. They create smiles and easy sharing. The best ones travel without mess, need no reheating, and mix sweet, salty, crunchy, and fresh flavors.
Choose snacks that hold up in a cooler or bag. Think finger foods, no-cook options, and make-ahead items. This keeps things simple for busy parents, students, or anyone new to cooking.
You can mix store-bought basics with quick homemade touches. The result feels homemade and costs little. Anyone can do this — even if you feel unsure in the kitchen.
Essential Ingredients for Beginner-Friendly Picnic Snacks
Start with pantry and fridge staples. These items create many tasty combinations without stress.
Must-have basics:
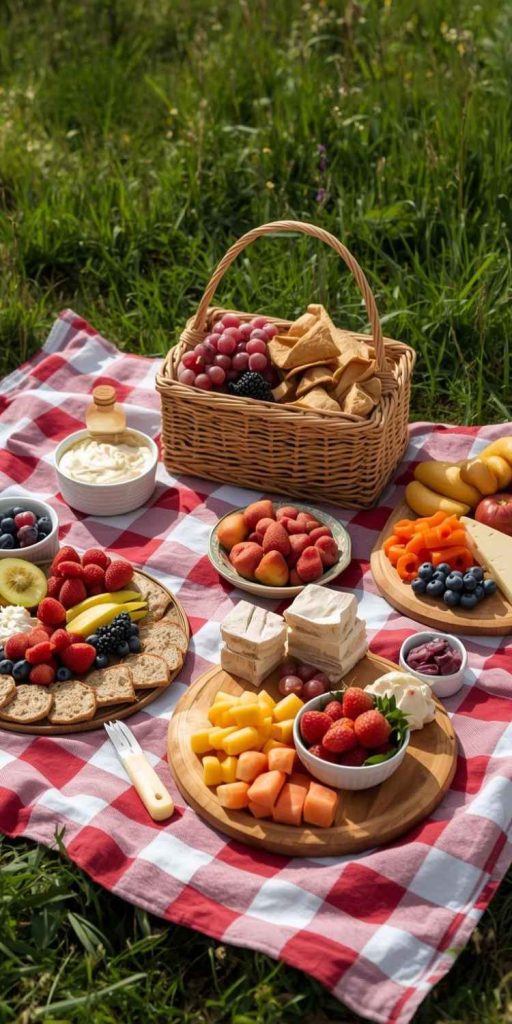
- Fresh fruits like apples, grapes, berries, watermelon, and bananas
- Vegetables such as carrot sticks, cucumber slices, cherry tomatoes, and bell pepper strips
- Crackers, pretzels, and tortilla chips
- Cheeses (hard varieties like cheddar or mozzarella that travel well)
- Nut butters or hummus for dipping
- Bread or wraps for simple sandwiches
- Eggs for quick hard-boiled treats
These ingredients stay affordable and versatile. Buy what looks fresh at your local market.
Smart Picnic Snack Ideas with Step-by-Step Instructions
Here are crowd-pleasing snacks you can prepare quickly. Each one includes clear steps so beginners feel confident.
1. Fresh Fruit Cups or Skewers
Fruit brings natural sweetness and color to any picnic.
Ingredients (serves 4-6):
- 2 cups grapes
- 1 cup strawberries or berries
- 1 cup melon chunks
- 2 bananas (add just before packing to avoid browning)
- Optional: wooden skewers
Steps:
- Wash all fruits under cool running water.
- Cut larger fruits into bite-size pieces.
- Layer in small reusable containers or thread onto skewers for fun.
- Pack with a small ice pack to keep cool.
These need almost no cooking and look beautiful. Kids love the colors and easy grabbing.
2. Veggie Sticks with Easy Dips
Crunchy veggies paired with simple dips satisfy everyone.
Ingredients for veggie platter:
- Carrot sticks
- Cucumber slices
- Cherry tomatoes
- Bell pepper strips
- Celery sticks
Quick Hummus Dip (no-cook):
- 1 can chickpeas (drained)
- 2 tablespoons tahini or olive oil
- Juice of 1 lemon
- 1 garlic clove (optional)
- Salt to taste
Steps for hummus:
- Add everything to a blender or mash with a fork for chunkier texture.
- Blend until smooth. Taste and adjust lemon or salt.
- Spoon into a small container.
Pair with store-bought ranch or yogurt-based dip if you prefer even simpler. Veggies stay crisp when kept cool.
3. Classic Cheese and Cracker Platter with a Twist
This elegant-yet-easy option feels like a mini grazing board.
Ingredients:
- Assorted cheeses (cheddar cubes, mozzarella balls)
- Crackers or pretzels
- Grapes or apple slices
- Optional: handful of nuts or olives
Steps:
- Cut cheeses into small, easy-to-grab pieces at home.
- Arrange in a container with dividers or separate bags to prevent mixing.
- Add fruits and crackers just before leaving.
Hard cheeses travel better than soft ones in warmer weather.
4. Simple Sandwich Roll-Ups or Pinwheels
These handheld bites beat soggy bread.
Ingredients (makes 8-10 roll-ups):
- Large tortillas or flatbread
- Cream cheese or hummus spread
- Sliced deli meat or cucumber and tomato for veggie version
- Shredded lettuce or spinach
Steps:
- Spread a thin layer of cream cheese or hummus on the tortilla.
- Add fillings in even layers.
- Roll tightly and slice into 1-inch pinwheels.
- Secure with toothpicks if needed and pack in a single layer.
Make peanut butter and banana for a sweet kid-friendly version. Wraps hold up better than regular sandwiches.
5. Hard-Boiled Eggs with a Flavor Boost
Protein-packed and portable.
Steps:
- Boil eggs for 10 minutes, then cool in ice water.
- Peel and sprinkle with salt, pepper, or a dash of paprika.
- For deviled style: mash yolks with a little mustard and yogurt, then refill whites.
Pack in an egg carton or container to prevent crushing. They stay safe when kept cold.
6. Homemade Trail Mix or Snack Bars
Control the sweetness and save money.
Simple Trail Mix:
- Mixed nuts
- Dried fruits like raisins or apricots
- Dark chocolate pieces
- Pretzel twists
Steps:
- Mix equal parts in a big bowl.
- Portion into small bags for easy sharing.
For no-bake bars, combine oats, peanut butter, honey, and mix-ins, then press into a pan and chill.
7. Pasta or Bean Salad in a Jar
Make-ahead salads that improve with time.
Easy Pasta Salad Ingredients (serves 6):
- 2 cups cooked pasta
- Cherry tomatoes
- Cucumber
- Cheese cubes
- Italian dressing or olive oil and vinegar
Steps:
- Cook pasta, rinse with cold water, and drain well.
- Chop veggies and mix everything in a bowl.
- Pack in mason jars with dressing on the bottom so greens stay crisp.
Vinegar-based dressings last longer outdoors than mayo-heavy ones.
Helpful Tables for Quick Planning
Picnic Snack Comparison Table
| Snack Type | Prep Time | Travels Well | Kid-Friendly | Budget-Friendly |
|---|---|---|---|---|
| Fresh Fruit Cups | 10 min | Excellent | Yes | Yes |
| Veggie Sticks + Dip | 15 min | Good | Yes | Yes |
| Cheese & Crackers | 5 min | Excellent | Yes | Moderate |
| Sandwich Roll-Ups | 15 min | Good | Yes | Yes |
| Hard-Boiled Eggs | 15 min | Good | Yes | Yes |
| Trail Mix | 5 min | Excellent | Yes | Yes |
| Pasta Salad | 20 min | Good | Moderate | Yes |
Make-Ahead Timeline Table
| Time Before Picnic | What to Prepare |
|---|---|
| Night Before | Boil eggs, cook pasta, make dips |
| Morning Of | Cut fruits/veggies, assemble roll-ups |
| 1 Hour Before | Pack cooler with ice packs |
| At the Picnic | Add bananas or delicate fruits |
These tables help you plan without overwhelm.
Pro Tips for Perfect Picnic Snacks
- Pack smart: Use separate coolers for drinks and food. Keep cold items below 40°F (4°C). Never leave perishables in the danger zone (40–140°F) for more than 2 hours — or 1 hour if it is very hot.
- Food safety first: Wash hands and produce at home. Visit the FDA guide on outdoor food safety for more details.
- Portion control: Small containers prevent waste and make sharing easy.
- Add creativity: Sprinkle herbs, spices, or a squeeze of lemon to elevate simple items.
- Budget tip: Buy seasonal produce and bulk nuts for lower costs.
- Allergy-friendly swaps: Offer nut-free options like seed butters or extra fruits.
These small steps make big differences in taste and safety.
More Creative Variations to Try
Once you master the basics, experiment:
- Caprese skewers with cherry tomatoes, mozzarella, and basil.
- Greek yogurt parfaits layered with granola and berries (keep yogurt chilled).
- Mini muffins or energy bites made with oats and peanut butter.
- Olive and cheese stuffed peppers for a savory bite.
Mix and match based on what your family enjoys. The goal is fun, not perfection.
FAQ
What are the best no-cook picnic snacks for beginners?
Fresh fruit, veggie sticks with store-bought dip, cheese and crackers, and trail mix need almost no prep and travel perfectly.
How do I keep picnic food safe in warm weather?
Use a good cooler with plenty of ice packs. Keep cold foods cold and limit how often you open the cooler. Check the FDA food safety guidelines for details.
Can I make picnic snacks ahead of time?
Yes! Most can be prepared the night before. Store in airtight containers and add delicate items like banana slices last.
What snacks work well for kids at picnics?
Pinwheel sandwiches, fruit skewers, hard-boiled eggs, and simple trail mix please little ones and are easy to eat with hands.
Are there healthy options among picnic snacks?
Absolutely. Focus on fresh fruits, vegetables with hummus, nuts, and yogurt-based dips for balanced, nutritious choices.
What should I avoid bringing to a picnic?
Items that spoil quickly like mayo-heavy salads without proper chilling, or foods that melt easily in heat.
How can I make my picnic snacks more exciting?
Add color with different fruits and veggies, use fun shapes for sandwiches, or create a simple grazing board everyone can share.
Conclusion
Packing a picnic does not need to feel complicated or stressful. With these easy, delicious snack ideas — from colorful fruit cups and crunchy veggie dips to simple roll-ups and satisfying trail mixes — you can create a spread that brings smiles to everyone.
Remember, the best meals come from simple steps and a little creativity. Start with one or two recipes this weekend. You will quickly gain confidence and discover your own favorite combinations.
Next time the sun shines and friends suggest an outdoor adventure, you will feel ready. Grab your basket, add these tasty bites, and enjoy the fresh air and good company.
Happy picnicking! Your homemade snacks will make every outdoor moment more flavorful and memorable. Cooking at home truly brings joy when you keep it simple, fun, and full of love.